Engine Mount Replacement - Right Side
Engine Mount Replacement - Right Side
Removal Procedure
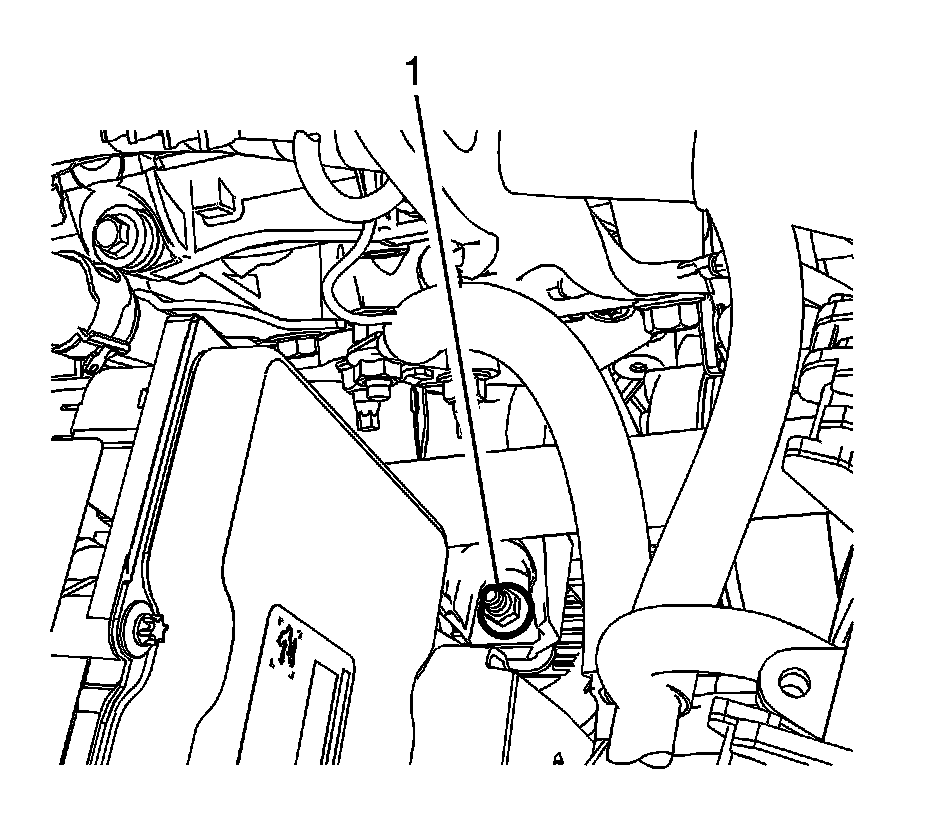
1. Remove the right hand engine mount to engine mounting bracket retaining nut (1).
2. Raise and support the vehicle. Refer to Lifting and Jacking the Vehicle Service and Repair.
Note:
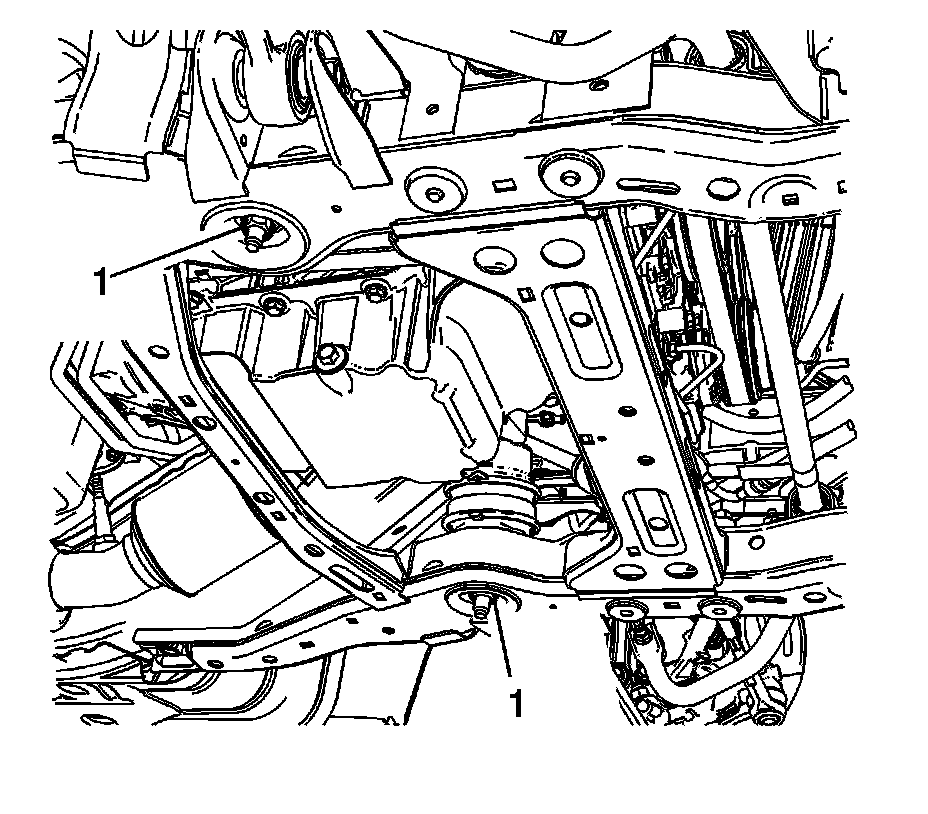
Removal of both lower engine mount nuts (1) will prevent stretching of the mount that isn't being replaced when the engine is lifted
3. Remove and discard the engine mount to front frame retaining nuts (1).
4. Position a screw jack and a block of wood under the engine oil pan.
5. Using the screw jack, carefully raise the engine until the engine is lifted high enough to remove the right hand engine mount.
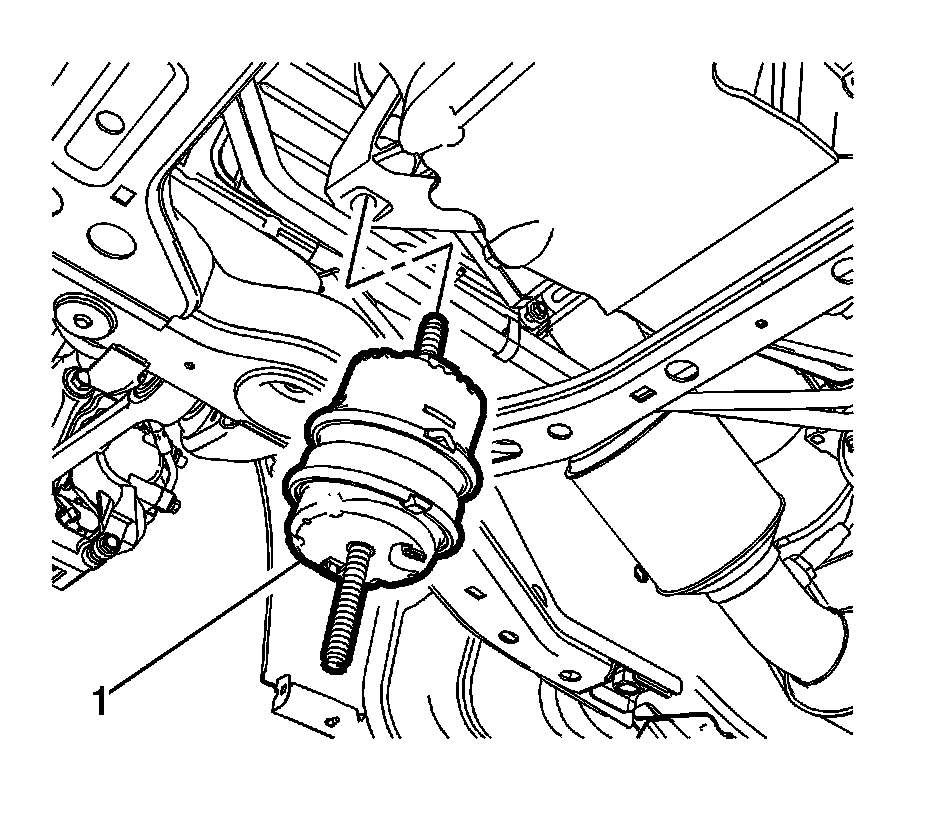
6. Remove the right hand engine mount (1) from the vehicle.
Installation Procedure
1. Install the right hand engine mount (1) to the frame rail.
Note:
When lowering the engine, ensure the left engine mount lower stud is aligned with the hole in the left frame rail.
2. Carefully lower the engine with the screw jack until the upper engine mount stud enters the right hand engine mount bracket hole.
3. Remove the screw jack and block of wood.
Caution:
Refer to Fastener Caution Fastener Caution.
4. Install NEW engine mount to frame retaining nuts (1).
Tighten the nuts to 80 Nm (59 lb ft).
5. Lower the vehicle.
6. Install the right hand engine mount to engine mounting bracket retaining nut (1).
Tighten the nut to 80 Nm (59 lb ft).