Rear Suspension
Stabilizer Shaft Link Replacement
Removal Procedure
1. Raise and support the vehicle. Refer to Lifting and Jacking the Vehicle (Service and Repair).
2. Remove the tire and wheel assemblies. Refer to Tire and Wheel Removal and Installation (Service and Repair).
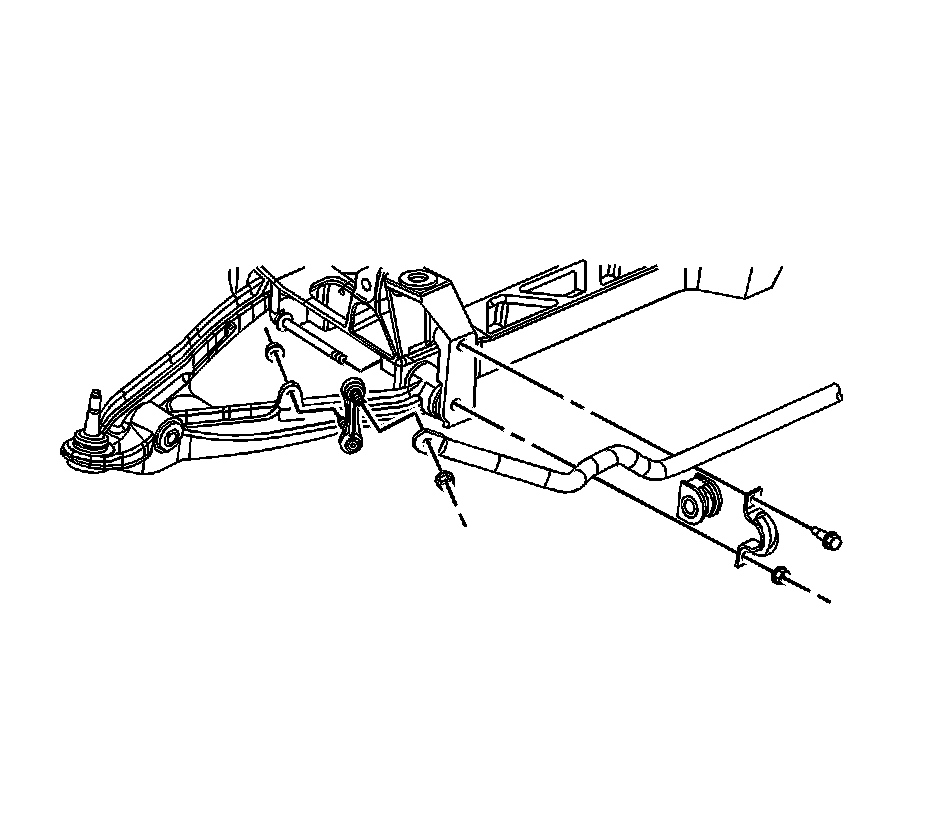
3. Remove the stabilizer shaft clamps, bolts and nuts retaining the shaft to the crossmember.
4. Remove the stabilizer shaft insulators from the stabilizer shaft.
Installation Procedure
1. Install the stabilizer shaft insulators to the stabilizer shaft.
2. Install the stabilizer shaft insulator clamps on the stabilizer shaft.
Caution: Refer to Fastener Caution (Fastener Caution).
Note: When installing the upper bolts and lower nuts, hand tighten them to hold the stabilizer shaft in place.
3. Install the upper stabilizer shaft bolts and tighten to 110 Nm (81 lb ft).
4. Install the lower stabilizer shaft nuts and tighten to :
* First Pass: 60 Nm (44 lb ft).
* Second Pass: plus 60 degrees.
5. Install the tire and wheel assemblies. Refer to Tire and Wheel Removal and Installation (Service and Repair).
6. Lower the vehicle.