Camshaft Position Exhaust Actuator Replacement
Camshaft Position Exhaust Actuator Replacement
Special Tools
* EN-45059 - Angle Meter
* EN-48749 - Timing Chain Retention Tool Kit
* EN-48953 - Camshaft Actuator Locking Tool
For equivalent regional tools, refer to Special Tools Special Tools.
Removal Procedure
1. Remove the camshaft cover. Refer to Camshaft Cover Replacement Service and Repair.
2. Remove the spark plugs. Refer to Spark Plug Replacement Service and Repair.
3. Remove the upper timing chain guide. Refer to Timing Chain Upper Guide Replacement Timing Chain Upper Guide Replacement.
4. Remove the front wheelhouse liner.
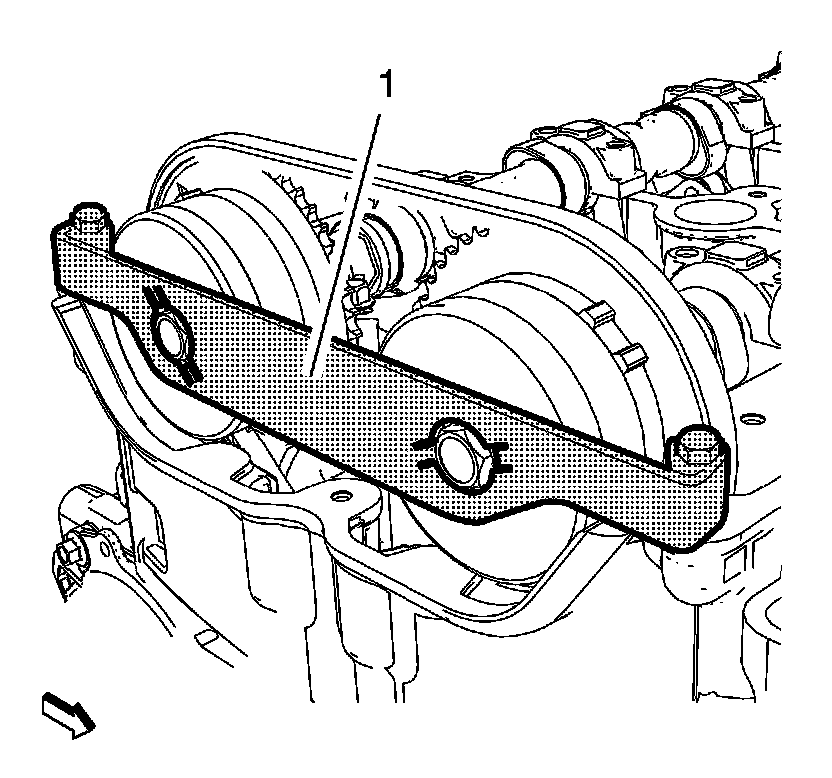
5. Rotate the crankshaft clockwise at the crankshaft balancer bolt and install the EN-48953 - locking tool(1) to the camshafts.
Caution:
Refer to Fastener Caution Fastener Caution.
6. Install the EN-48953 - locking tool bolts and tighten to 10 Nm (89 lb in).
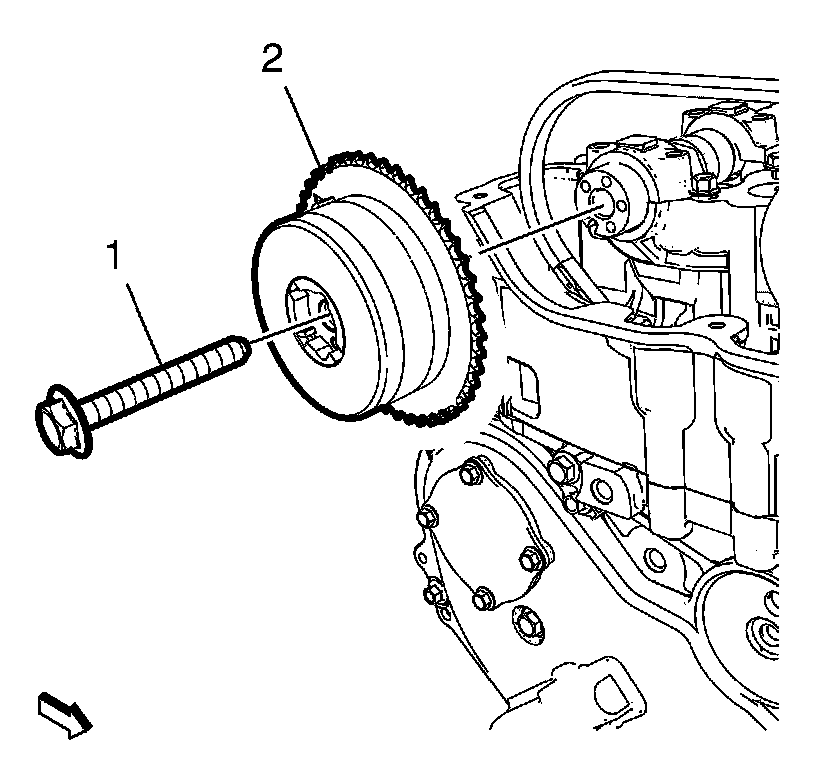
7. Loosen, but DO NOT remove, the camshaft position exhaust actuator bolt (1).
8. Remove the EN-48953 - locking tool.
Note:
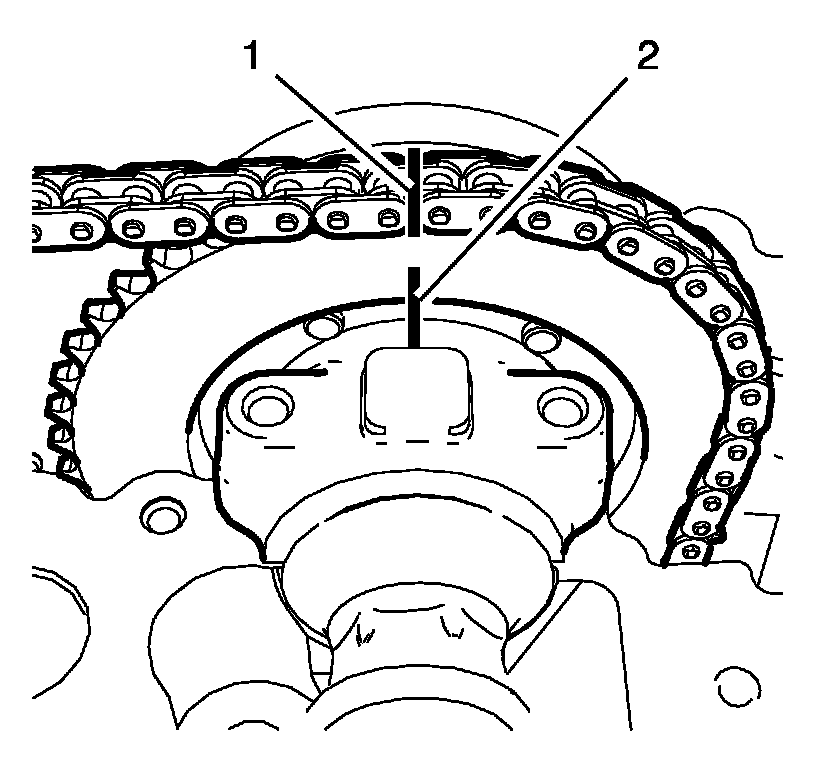
Ensure the timing chain and the camshaft position actuators are marked for proper assembly.
9. Mark the intake and exhaust camshaft actuators and the respective locations on the timing chain (1). Mark additional the position from each camshaft actuator to the camshaft bearing cover (2).
10. Remove the timing chain tensioner. Refer to Timing Chain Tensioner Replacement Service and Repair.
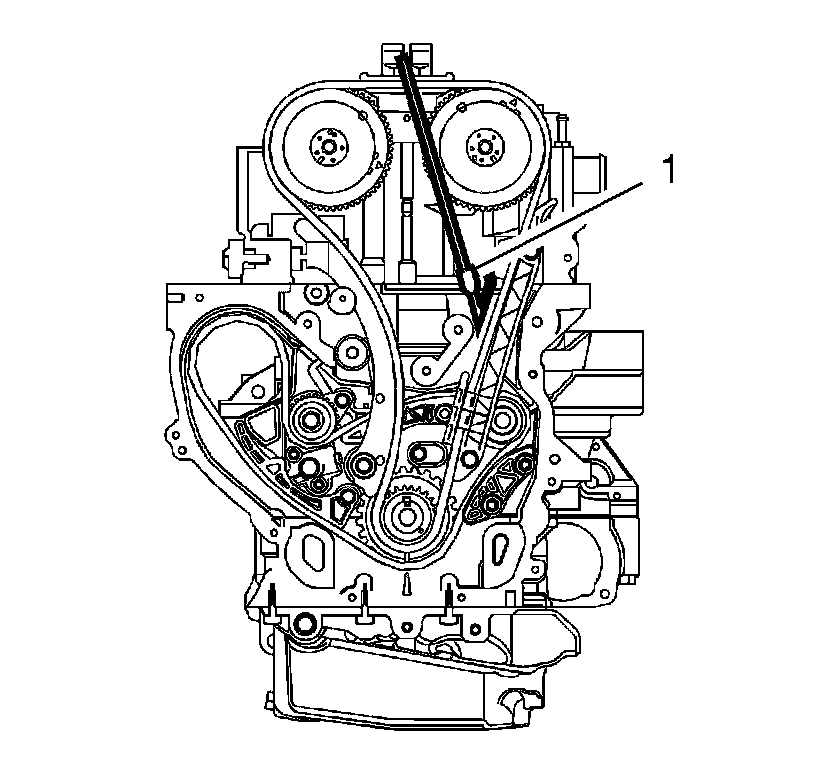
11. Install the EN-48749 - retention tool(1) to the intake side of timing chain.
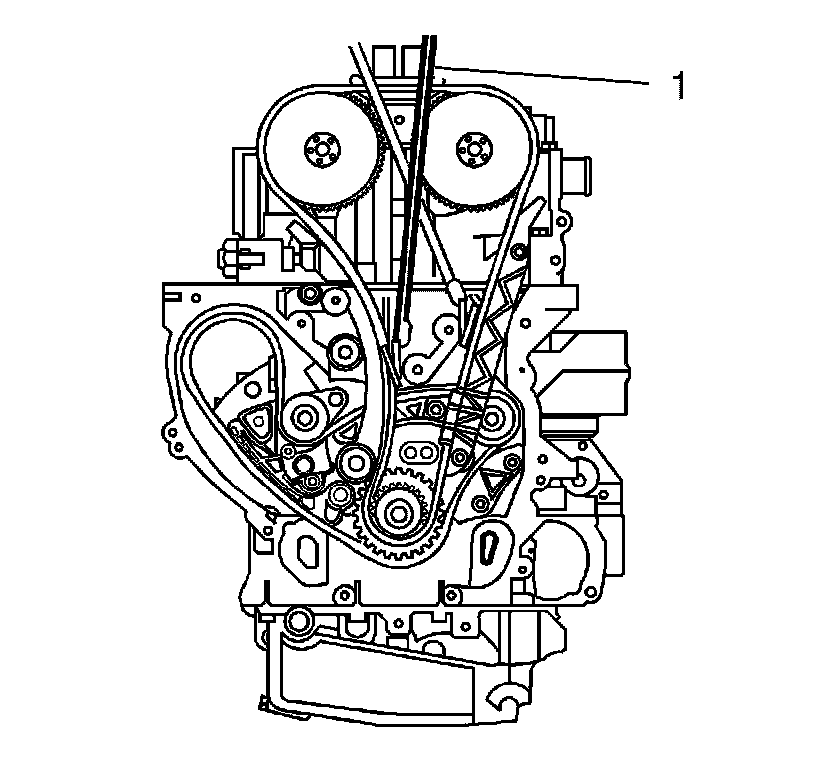
12. Install the EN-48749 - retention tool(1) to the exhaust side of the timing chain.
13. Remove and DISCARD the camshaft position exhaust actuator bolt (1).
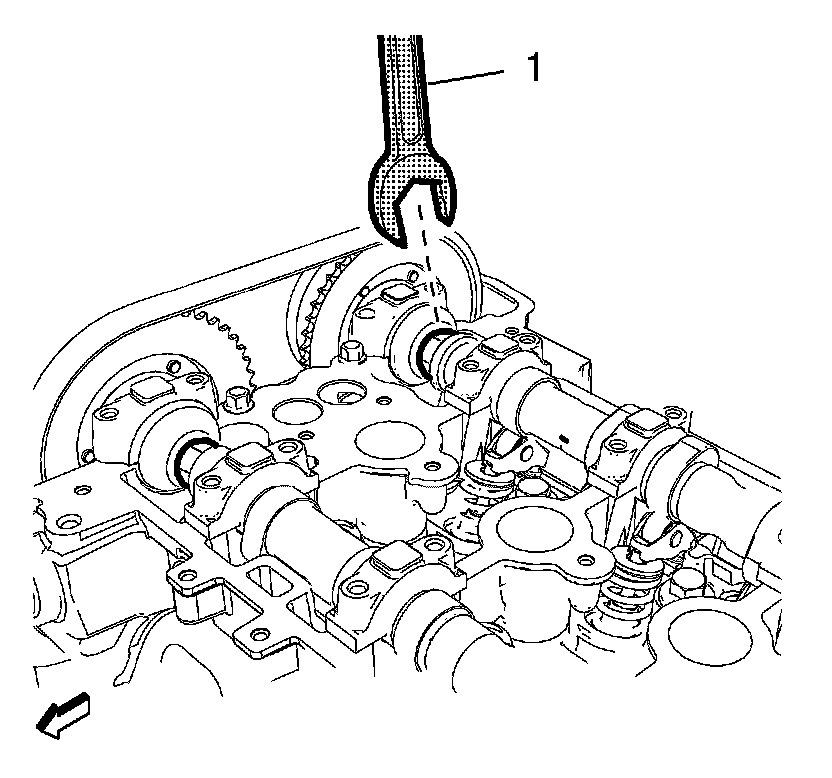
14. Rotate the exhaust camshaft clockwise with an open ended wrench slightly to take the tension off of the timing chain on the intake actuator.
15. Remove the exhaust camshaft actuator (2) from the camshaft while also removing the actuator from the timing chain.
16. Release tension from the exhaust camshaft and allow the exhaust camshaft to slide back slowly.
Installation Procedure
1. Mark the new exhaust camshaft actuator at the same point as the old exhaust camshaft actuator.
Note:
Ensure the timing chain and the camshaft position actuators are on their marked points.
Ensure that the exhaust camshaft actuator fully fits in the exhaust camshaft.
2. Rotate the exhaust camshaft clockwise with an open ended wrench slightly to fit the exhaust camshaft actuator in the exhaust camshaft.
3. Install the exhaust camshaft actuator (2) to the camshaft while also installing the actuator at the timing chain.
4. Release tension slowly from the exhaust camshaft.
5. Install the NEW camshaft position exhaust actuator bolt (1) handtighten.
6. Remove both EN-48749 - retention tool from the timing chain.
7. Reset and install the timing chain tensioner. Refer to Timing Chain Tensioner Replacement Service and Repair.
8. Install the EN-48953 - locking tool(1) to the camshafts.
9. Install the EN-48953 - locking tool bolts an tighten to 10 Nm (89 lb in).
10. Tighten the exhaust camshaft actuator (2) a first pass to 30 Nm (22 lb in).
Caution:
Refer to Torque-to-Yield Fastener Caution Torque-to-Yield Fastener Caution.
11. Tighten the exhaust camshaft actuator a final pass to an additional 100 degrees, using the EN-45059 - meter.
12. Remove the EN-48953 - locking tool.
13. Rotate the crankshaft clockwise at the crankshaft balancer bolt to 720 degrees and ensure that the marks are still fit. If the marks are not fit, refer to Camshaft Timing Chain, Sprocket, and Tensioner Replacement Camshaft Timing Chain, Sprocket, and Tensioner Replacement.
14. Install the front wheelhouse liner.
15. Install the upper timing chain guide. Refer to Timing Chain Upper Guide Replacement Timing Chain Upper Guide Replacement.
16. Install the spark plugs. Refer to Spark Plug Replacement Service and Repair.
17. Install the camshaft cover. Refer to Camshaft Cover Replacement Service and Repair.