Rear Driveshaft Installation
Rear Driveshaft Installation
NOTE: Before starting installation, make sure the mating surfaces of the joint and the splined section are clean.
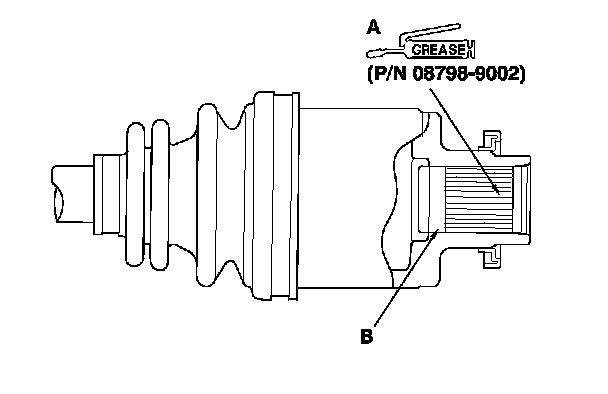
1. Apply 1.5-2.0 g (0.05-0.07 oz) of super high temp urea grease (P/N 08798-9002) to the whole splined surface (A). After applying grease, remove the grease from the splined grooves at intervals of 2-3 splines and from the set ring groove (B) so that air can bleed from the differential.
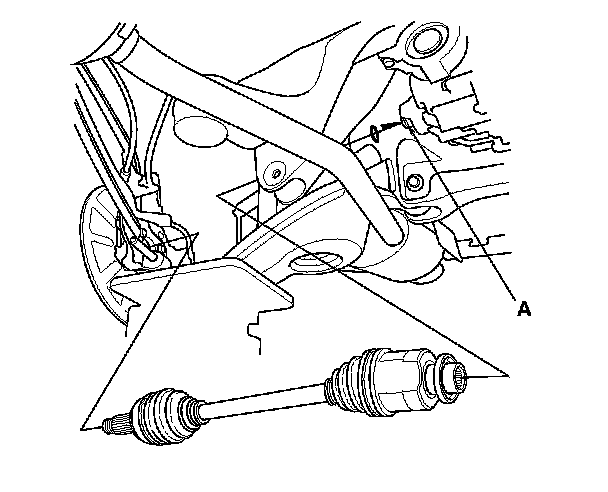
2. Install a new set ring in the set ring groove (A) of the differential.
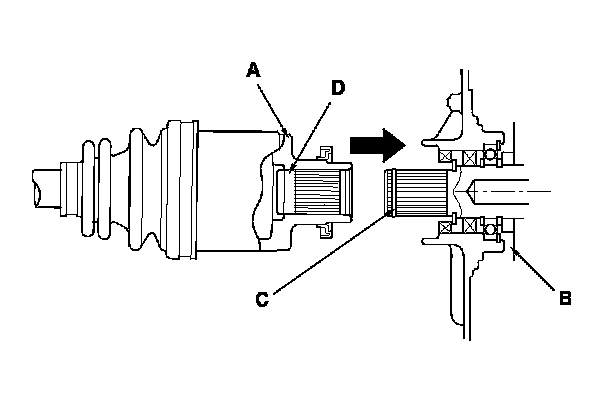
3. Clean the areas where the driveshaft contacts the differential thoroughly with solvent or brake cleaner, and dry with compressed air. Insert the inboard end (A) of the driveshaft into the differential (B) until the set ring (C) locks in the groove (D).
4. Pull the knuckle (A) outward, and install the rear driveshaft outboard joint (B) into the rear hub.
NOTE: When installing the outboard joint continue supporting both the knuckle and lower arm with the transmission jack. Make sure not to over extend the brake hose.
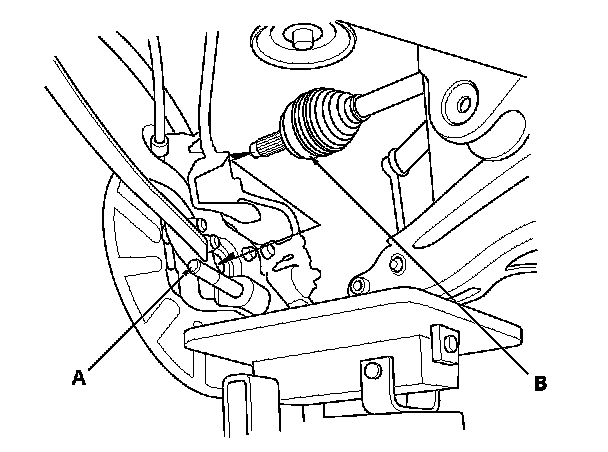
5. Loosely install the flange bolt (A) onto lower arm B.
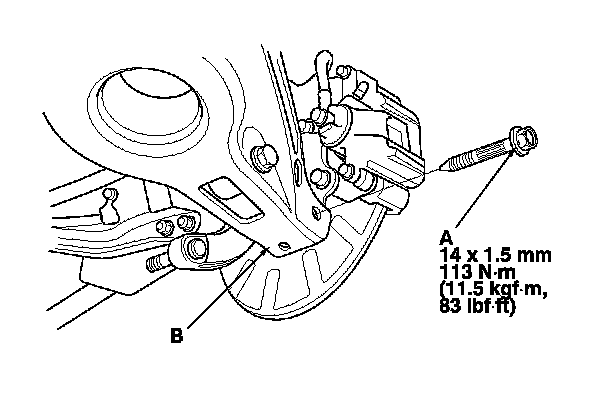
6. Install the lower arm A, then loosely install a new flange bolt (B) and a new self-locking nut (C) with a washer (D).
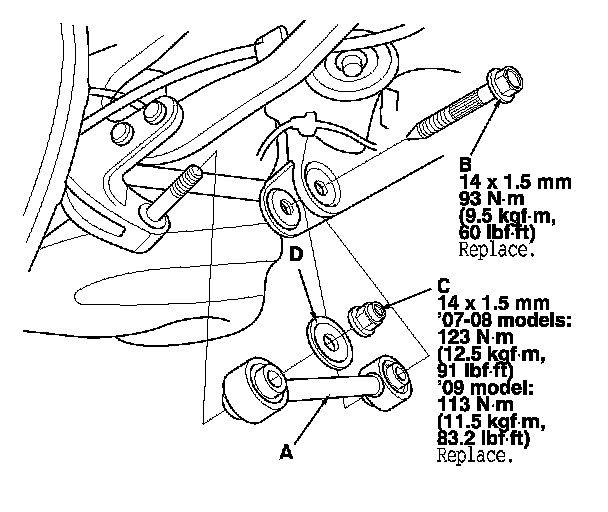
7. Install the upper arm (A). Be careful not to damage the ball joint boot (B). Wipe off the grease before tightening the nut at the ball joint.
8. Torque the new castle nut (C) to the lower torque specification, then tighten it only far enough to align the slot with the ball joint pin hole. Do not align the nut by loosening it.
NOTE: Make sure the ball joint boot is not damaged or cracked.
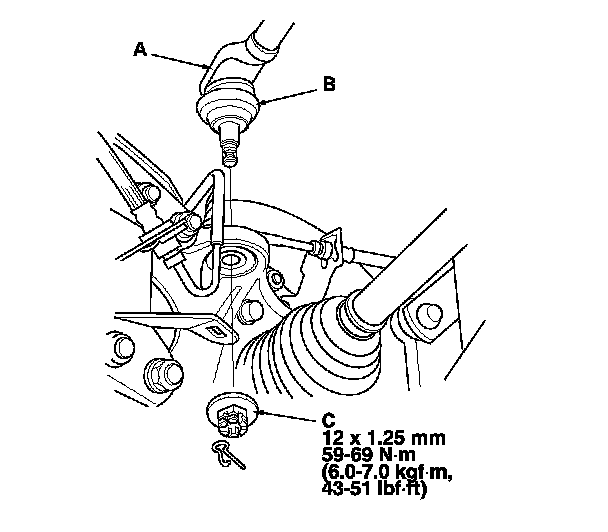
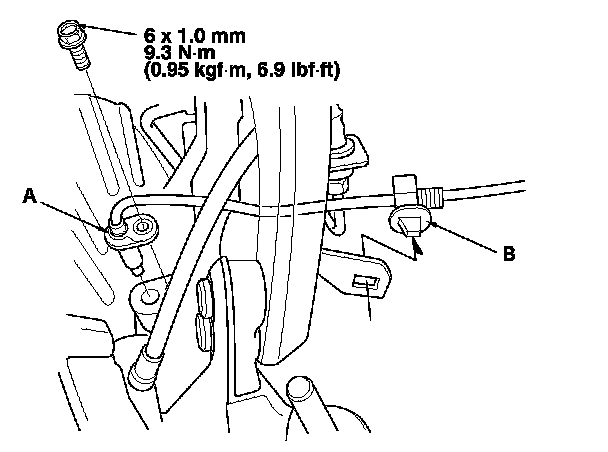
9. Install the rear wheel sensor (A) and harness clip (B).
10. Place a floor jack under the lower arm, and raise the suspension to load it with the vehicle's weight.
11. Tighten the lower arm B flange bolt, the lower arm A self-locking nut and the lower arm A flange bolt to the specified torque values.
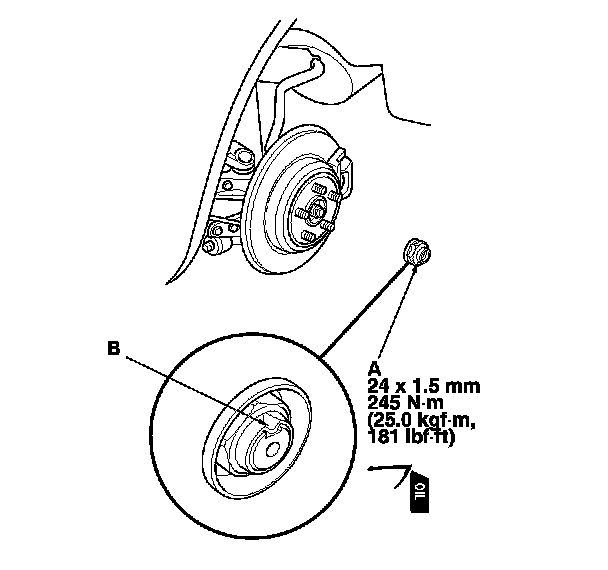
12. Apply a small amount of engine oil to the seating surface of a new spindle nut (A).
13. Install the spindle nut, then tighten it. After tightening, use a drift to stake the spindle nut shoulder (B) against the driveshaft.
14. Clean the mating surfaces of the brake disc and the rear wheel, then install the rear wheels.
15. Turn the rear wheel by hand, and make sure there is no interference between the driveshaft and surrounding parts.
16. Lower the vehicle on the lift.
17. Check the rear wheel alignment, and adjust it if necessary. Service and Repair
18. Test-drive the vehicle.