Rear Differential Side Case Replacement
Rear Differential Side Case Replacement
1. Remove the rear differential. Rear Differential Removal
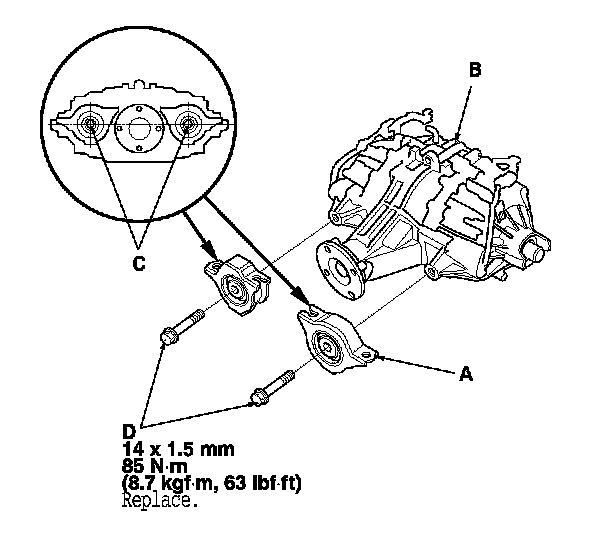
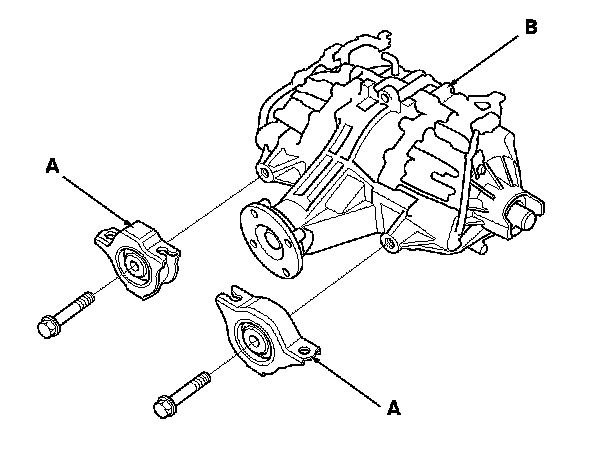
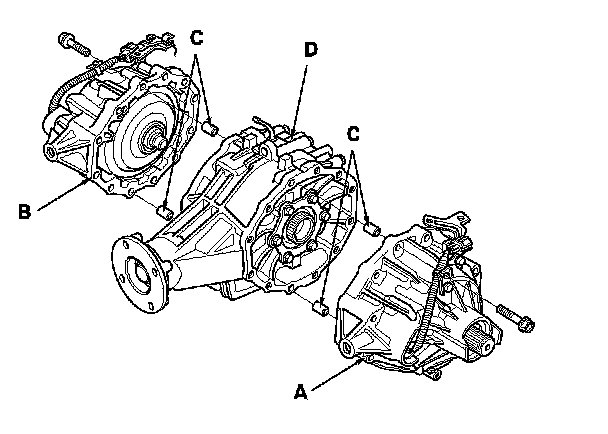
2. Remove the rear differential front mounting brackets (A) from the rear differential (B).
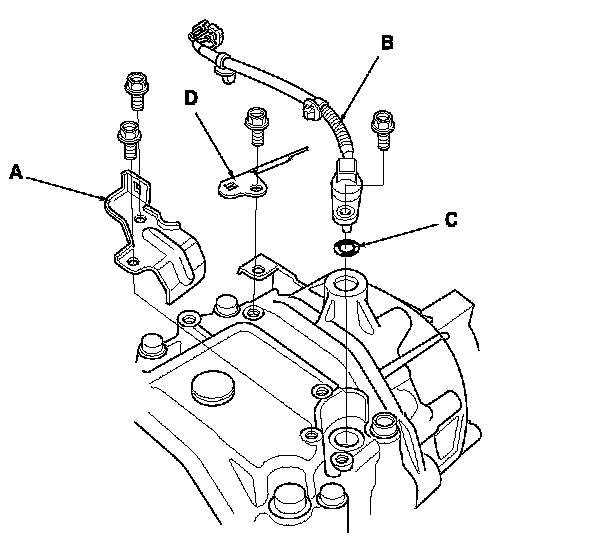
3. Remove the rear differential fluid temperature sensor cover (A), the rear differential fluid temperature sensor (B), the O-ring (C), and the rear differential harness bracket (D) with bolts.
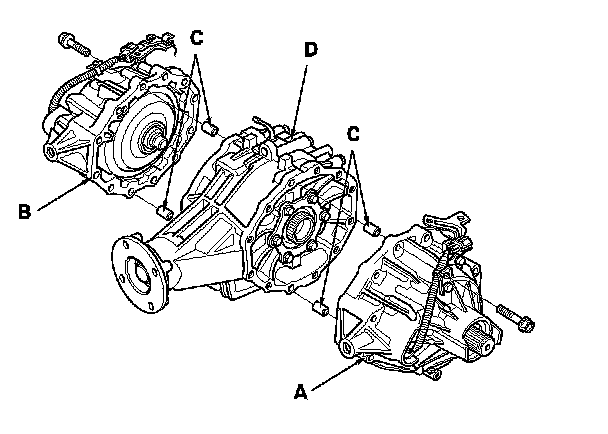
4. Remove the rear differential left side case (A) or the rear differential right side case (B), the 10 x 12 mm dowel pins (C) from the rear differential center case (D).
5. Replace the rear differential left side case or the differential right side case.
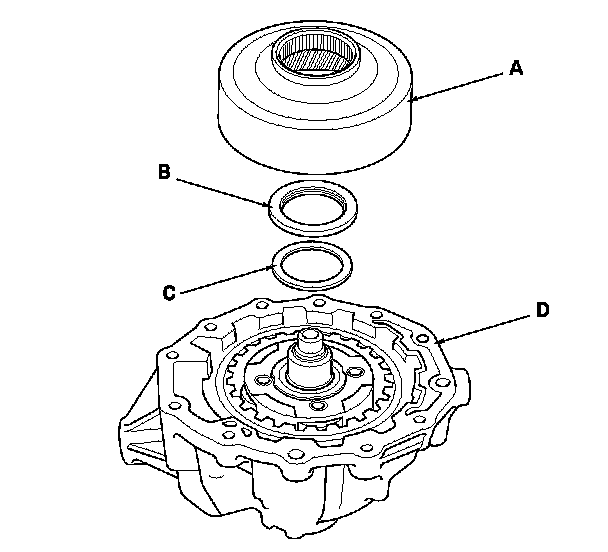
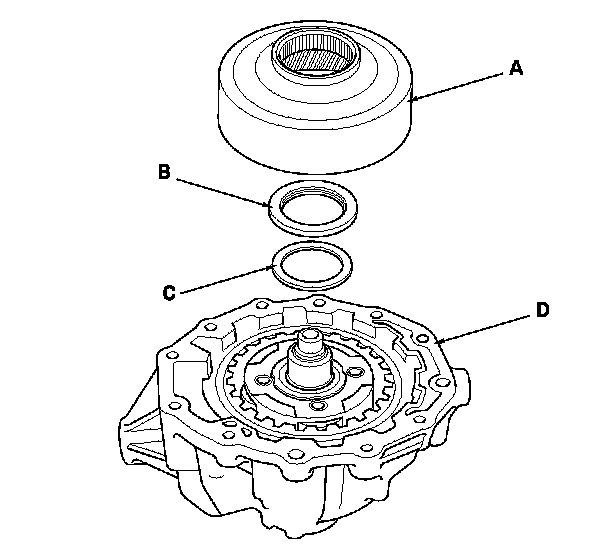
6. Remove the ring gear (A), the needle bearing (B), and the 60.2 mm shim (C) from the rear differential side case (D).
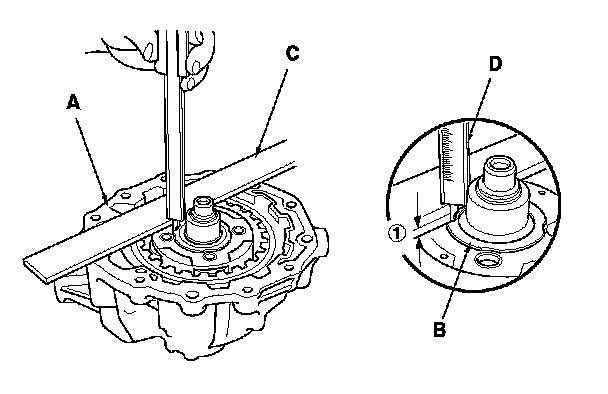
7. Measure distance (1) between the end of the rear differential side case (A) and the 60.2 mm shim contact area of planetary gear (B) with a straight edge (C) and depth gauge (D). Measure at three locations, and average the reading.
NOTE:
- Carry out the measurement at normal room temperature.
- Clean all the parts thoroughly before measure.
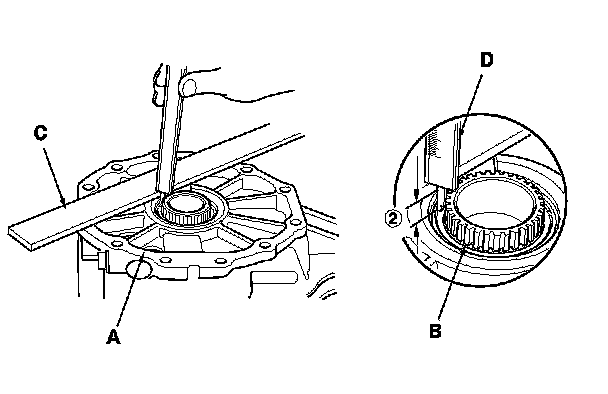
8. Measure distance (2) between the end of the rear differential center case (A) and the ring gear contact area of taper roller bearing (B) with a straight edge (C) and depth gauge (D). Measure at three locations, and average the reading.
NOTE:
- Carry out the measurement at normal room temperature.
- Clean all the parts thoroughly before measure.
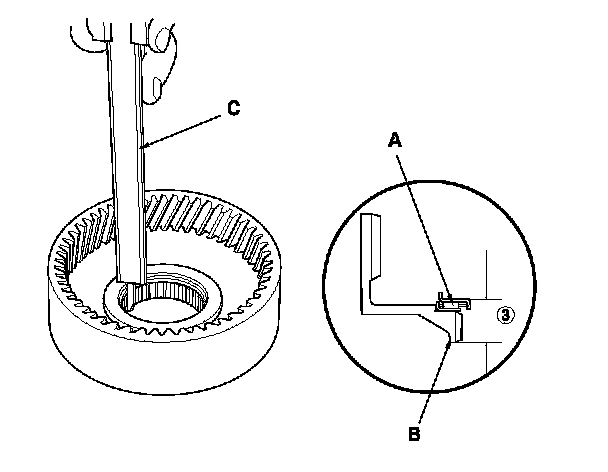
9. Measure the distance (3) between the needle bearing (A) and the tapper roller bearing contact area of ring gear (B) with a depth gauge (C). Measure at three locations, and average the reading.
NOTE:
- Carry out the measurement at normal room temperature.
- Clean all the parts thoroughly before measure.
Shim Selection Formula
10. Select the proper 60.2 mm shim from the table. Follow the example below, and use the measurements you made in step 7 to 9.
(Basic Formula)

0.19 mm (0.007 in.): middle of the clearance standard.

(For example)
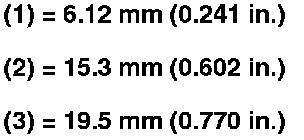
6.12 + 15.3 - (19.5 + 0.19) = 1.73 mm
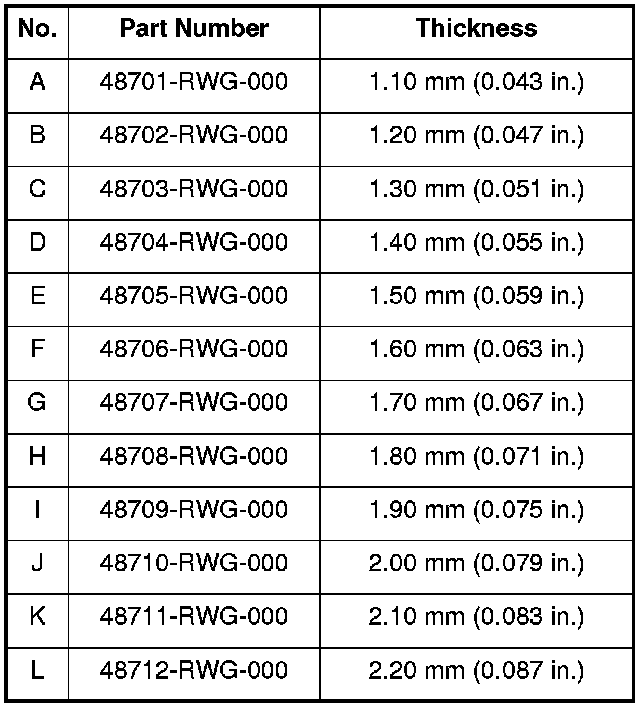
Select the 1.70 mm shim from the table.
60.2 mm shim
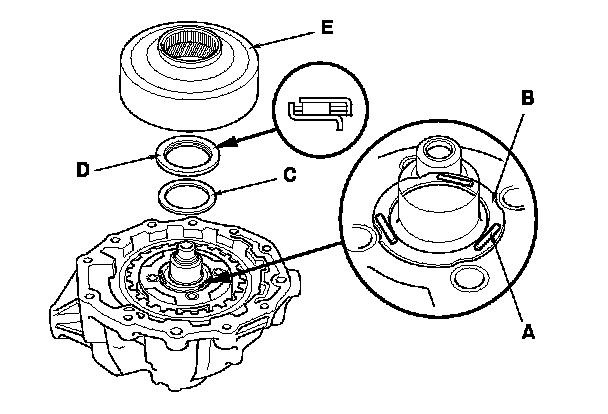
11. Place one strip of plastigage (A) on 60.2 mm shim contact area of planetary gear (B). Install the 60.2 mm shim (C), needle bearing (D), and the ring gear (E). Measure at three locations, and average the reading.
NOTE:
- Carry out the measurement at normal room temperature.
- Clean all the parts thoroughly before measure.
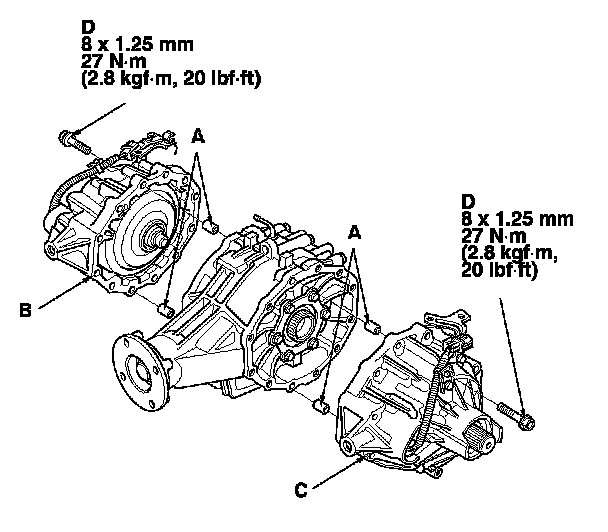
12. Install the 8 x 12 mm dowel pins (A), the rear differential right side case (B) or the rear differential left side case (C) and the mounting bolts (D).
13. Tighten the mounting bolts in a crisscross pattern in several steps.
14. Remove the rear differential left side case (A) or the rear differential right side case (B), the 10 x 12 mm dowel pins (C) from the rear differential center case (D).
15. Remove the ring gear (A), the needle bearing (B), and the 60.2 mm shim (C) from the rear differential side case (D).
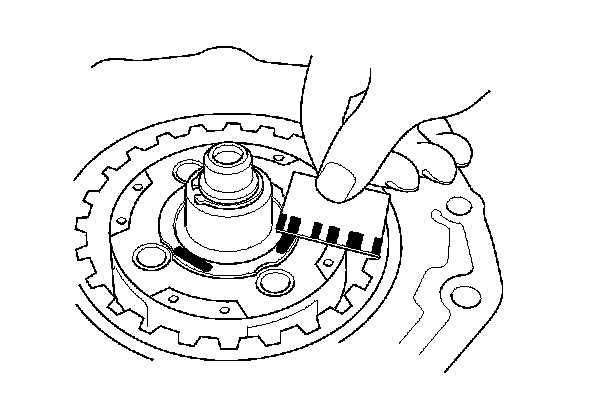
16. Measure the widest part of the plastigage.

17. If the clearance is more than the standard, go to step 7. If the clearance measured in step 16 is within the standard, go to step 18.
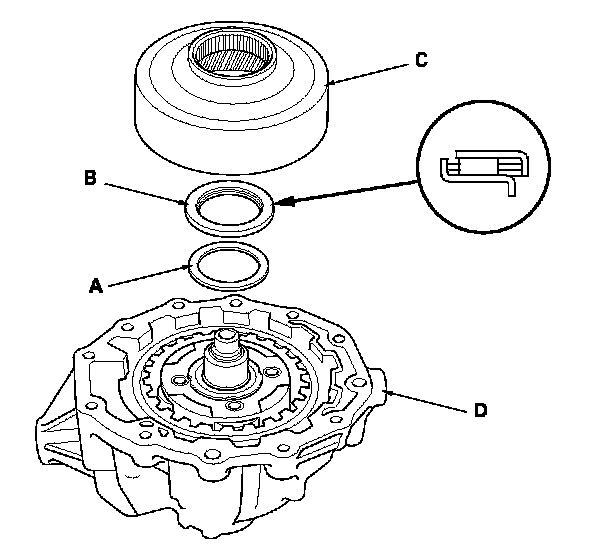
18. Install the 60.2 mm shim (A), the needle bearing (B), and the ring gear (C) onto the rear differential side case (D).
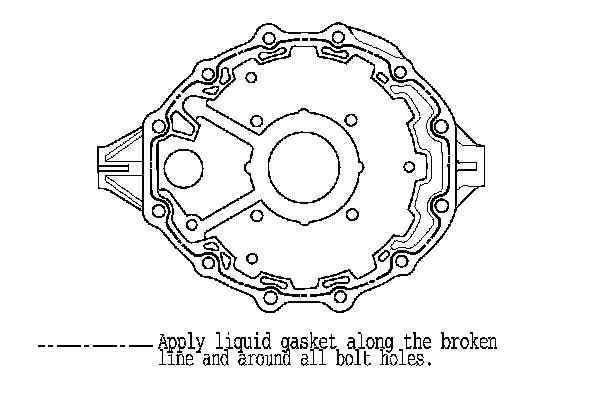
19. Remove the dirt and oil from the sealing surfaces. Apply liquid gasket (P/N 08717-0004, 08718-0001, 08718-0003, 08718-0009) to the sealing surface. Make sure you seal the entire circumference of the bolt holes to prevent oil leakage.
NOTE:
- You must assemble the housings within do in 5 minutes after applying the liquid gasket. If not, the sealing surface must be cleaned, and the liquid gasket reapplied.
- Allow it to cure at least 30 minutes after assembly before filling the differential with fluid.
Left side case/Right side case
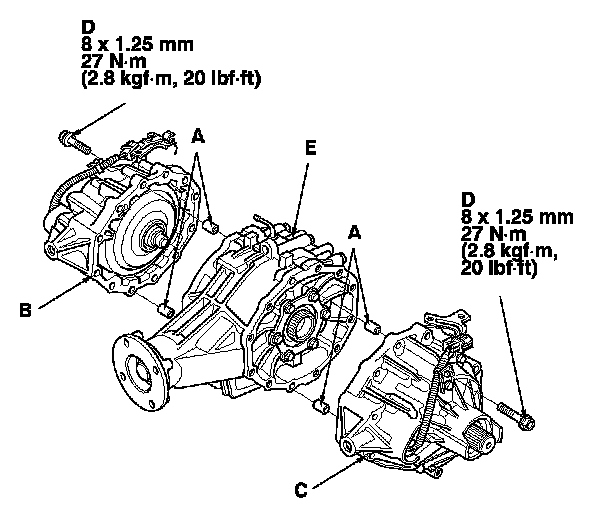
20. Install the 8 x 12 mm dowel pins (A), the rear differential right side case (B) or the rear differential left side case (C), and the mounting bolts (D) onto the rear differential center case (E).
21. Tighten the mounting bolts in a crisscross pattern in several steps.
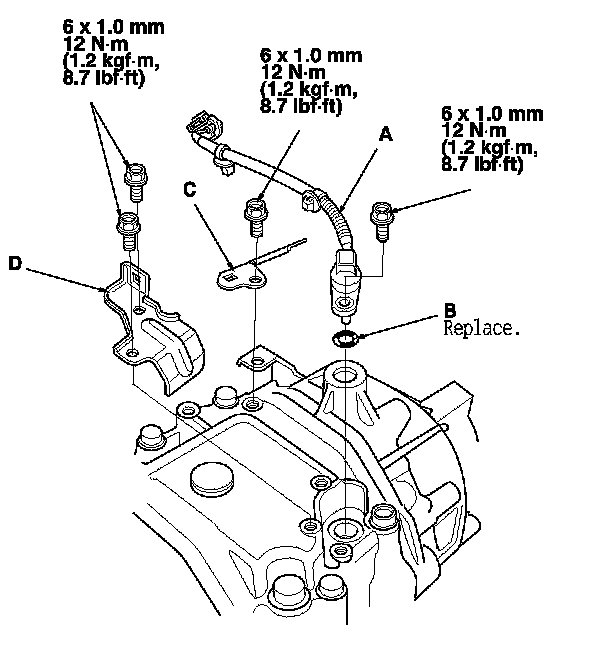
22. Install the rear differential fluid temperature sensor (A), new O-ring (B), rear differential harness bracket (C), and rear differential fluid temperature sensor cover (D) with bolts.
23. Install the rear differential front mounting brackets (A) from the rear differential (B).
NOTE: Install a lower surface of the guides (C) horizontally as shown, then tighten the new rear differential front mounting bracket bolts (D).
24. Install the rear differential. Rear Differential Installation
25. Refill the differential fluid. Rear Differential Fluid Inspection and Replacement
26. Do the SH-AWD differential clutch torque memorization. SH-AWD Differential Clutch Torque Memorization