Steering Gearbox Installation
Steering Gearbox Installation
1. Before installing the steering gearbox, make sure that no power steering fluid is on the mating surface of the steering gearbox and front subframe. To prevent the gearbox mounting bolts from loosening after the installation, remove any power steering fluid from the mount cushions and bolt holes.
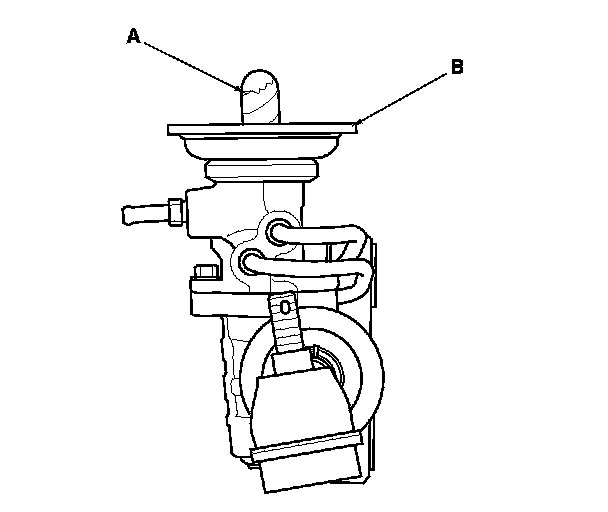
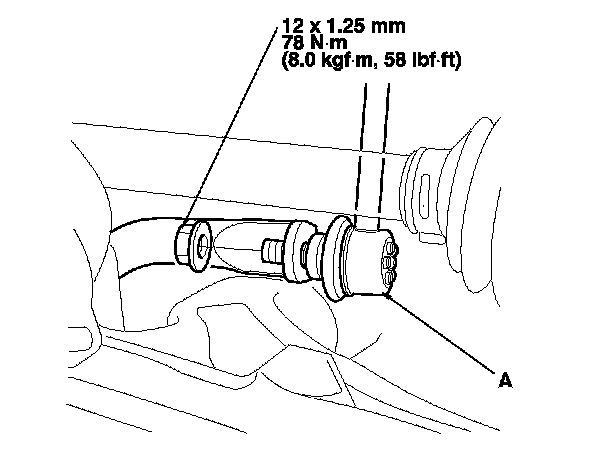
2. Apply vinyl tape to the splines on the pinion shaft (A).
3. Install the pinion shaft grommet B on the top of the valve housing.
4. Slide the steering gearbox (A) between the front subframe and body from the driver's side.
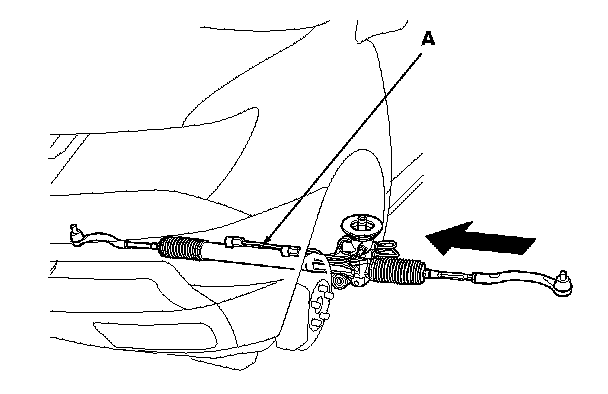
5. Carefully move the steering gearbox (A) toward the passenger's side until the pinion shaft clears the wheelwell opening on the body.
6. Continue moving the gearbox toward the passenger's side until the steering gearbox is in position.
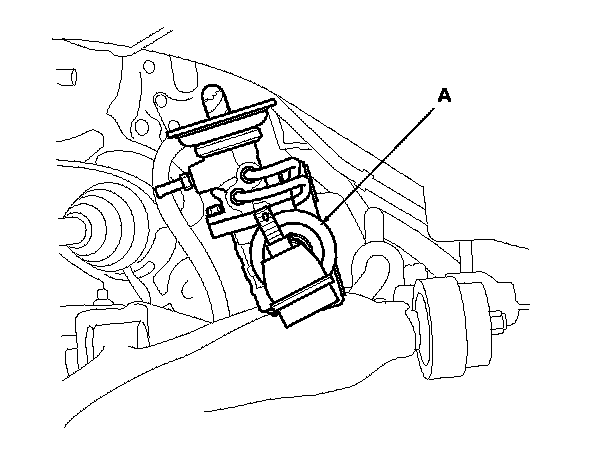
7. Install the gearbox stiffener bracket (A) on the left side of the front subframe, and tighten the bolts and nut to the specified torque.
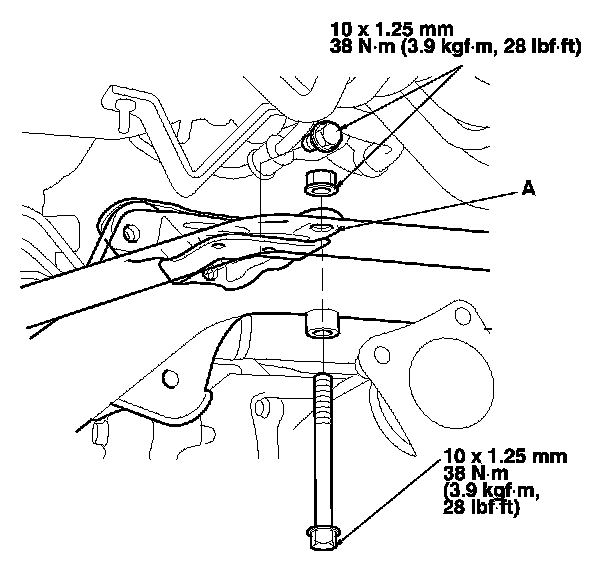
8. Loosely install the new mounting bolts (A) on the left side of the steering gearbox.
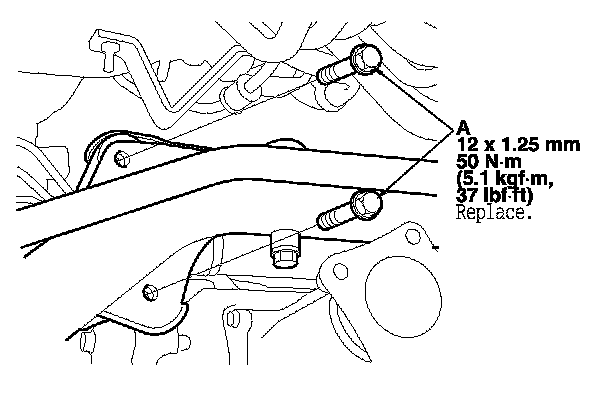
9. Position the cutout (A) on the mounting cushion (B) as shown, and install it on the right side of the steering gearbox.
10. Install the gearbox mounting bracket (C) over the mounting cushion, and loosely install the mounting bolts.
11. Tighten the mounting bolts on both sides of the steering gearbox to the specified torque alternately in two or more steps.
12. Carefully raise the front subframe with the subframe adapter and the transmission jack or the powertrain lift until the subframe is it position.
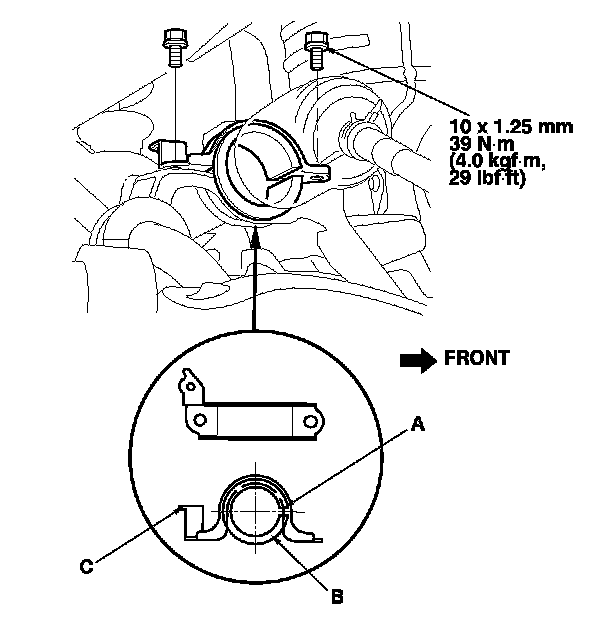
13. Align all reference marks (A) on the front subframe (B) with the body.
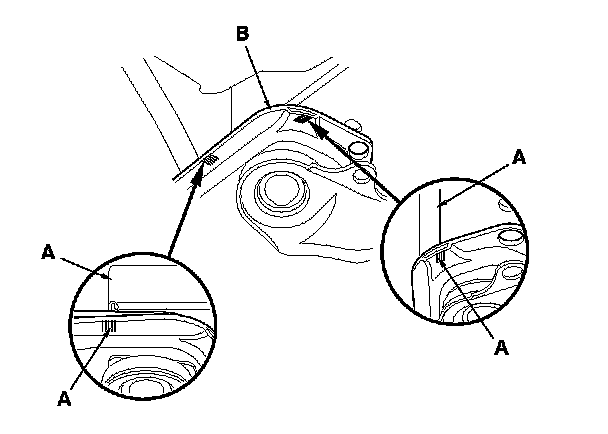
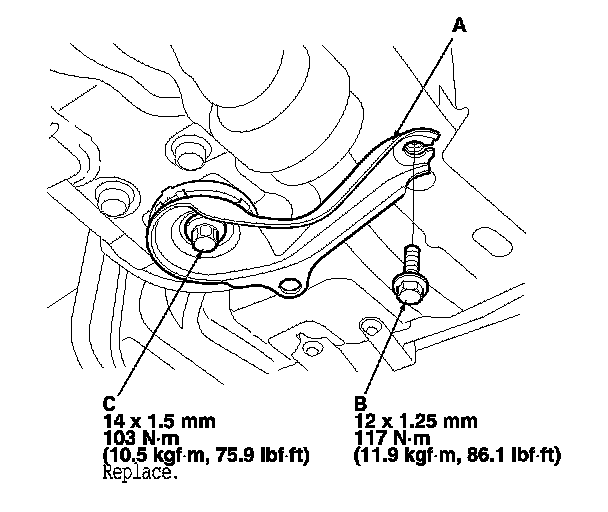
14. Install the front subframe front brackets (A) with mounting bolts (B) and the new special bolts (C), and tighten to the specified torque.
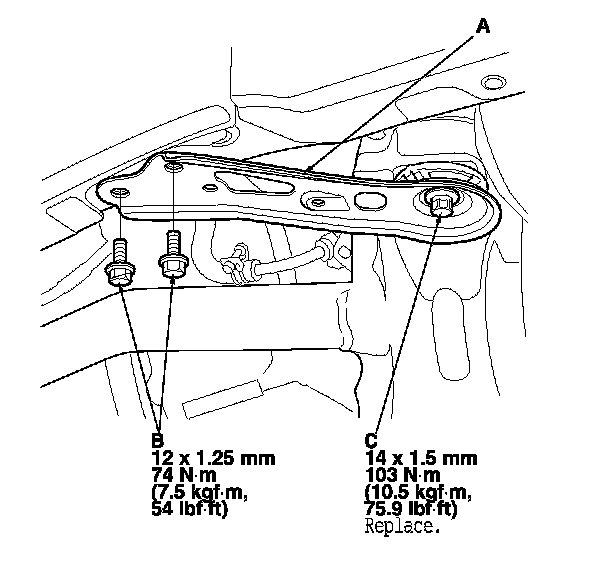
15. Install the front subframe rear brackets (A) with mounting bolts (B) and the new special bolts (C), and tighten to the specified torque.
16. Lower the transmission jack supporting the front subframe.
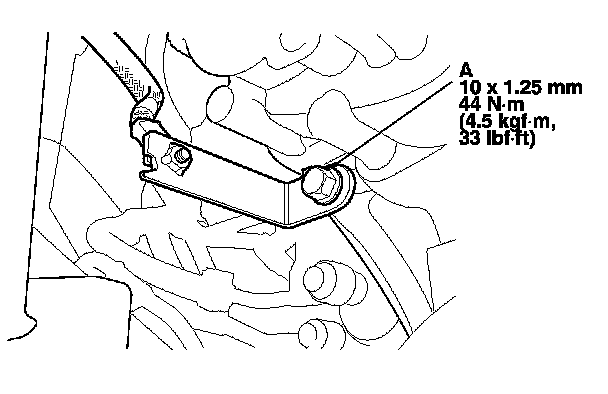
17. Install the ground cable bolt (A) to the transmission.
18. Install the base bracket (A) with new mounting bolts (B) and mounting bolts (C), and tighten to the specified torque.
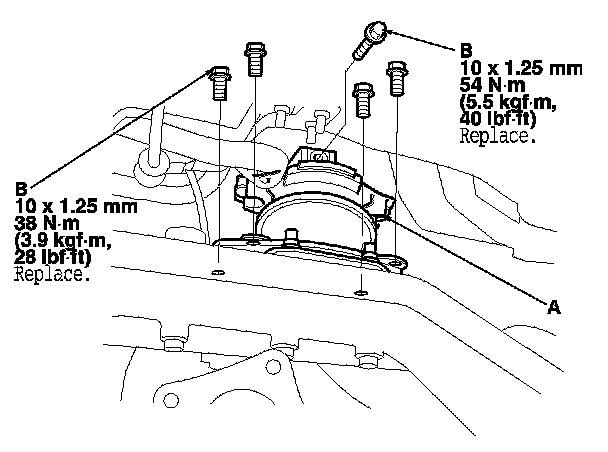
19. Install the rear engine mount (A) with new mounting bolts (B), and tighten to the specified torque.
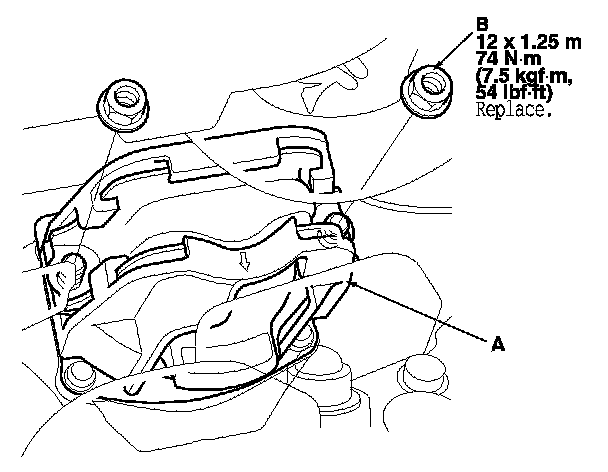
20. Install the rear mount stop (A) with new mounting nuts (B), and tighten to the specified torque.
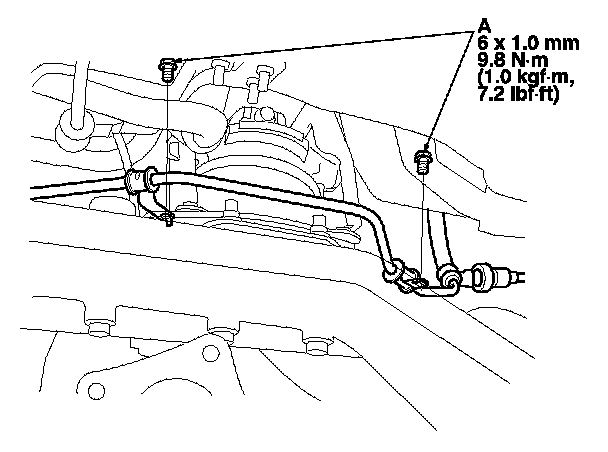
21. Install the inlet line clamp bolts (A), and tighten to the specified torque.
22. Install exhaust pipe A. Service and Repair
23. Install the propeller shaft and propeller shaft protectors. Propeller Shaft Installation
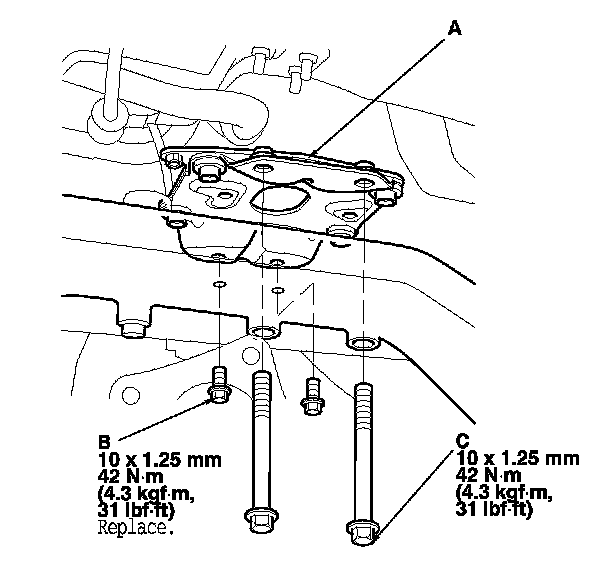
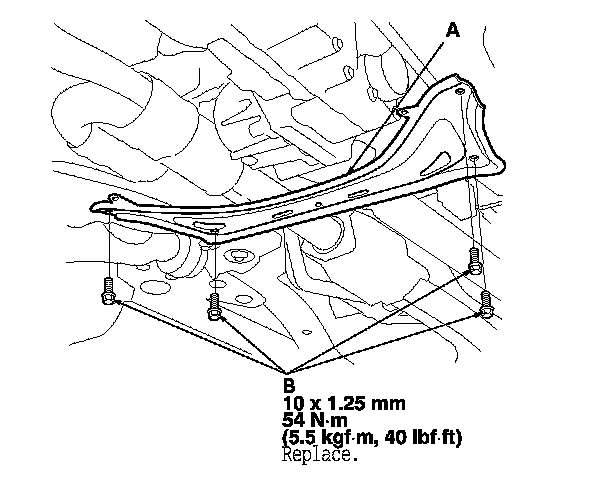
24. Install the front subframe stiffener plate (A) with new mounting bolts (B), and tighten to the specified torque.
25. Install the front undercover Front Undercover Replacement and the front splash shield. Splash Shield Replacement
26. Connect the stabilizer links (A) to the lower arms. Front Stabilizer Link Removal/Installation
27. Connect the lower arm ball joints to the knuckles. Front Lower Arm Removal/Installation
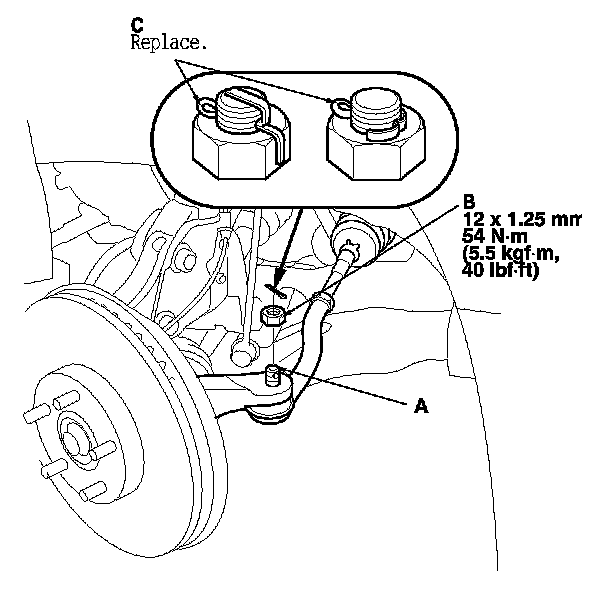
28. Wipe off any grease contamination from the ball joint tapered section and threads. Reconnect the tie-rod ball joints (A) to the knuckles. Install the 12 mm nuts (B) and tighten it to the specified torque.
29. Install the new cotter pin (C) and bend it as shown.
30. Remove the engine support hanger, the hanger balance bar, and the hanger adapter set.
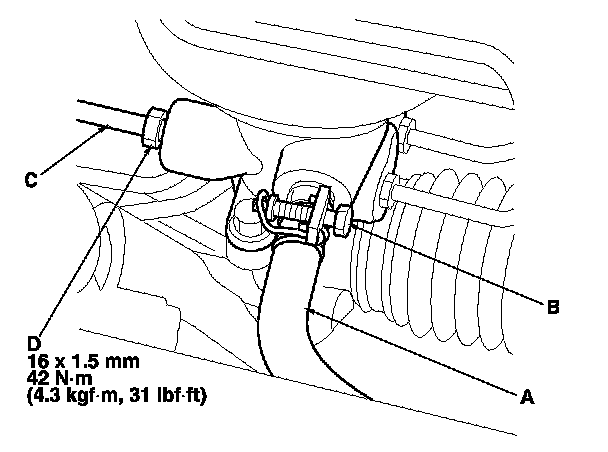
31. Connect the return hose (A) securely, and tighten the adjustable hose clamp (B). Service and Repair
32. Connect the inlet line (C), and tighten the 16 mm flare nut (D) to the specified torque.
33. Install the front wheel, then set the wheels in the straight ahead position.
NOTE: Before installing the wheel, clean the mating surfaces of the brake disc and inside of the wheel.
34. Lower the vehicle.
35. Center the steering rack within its stroke.
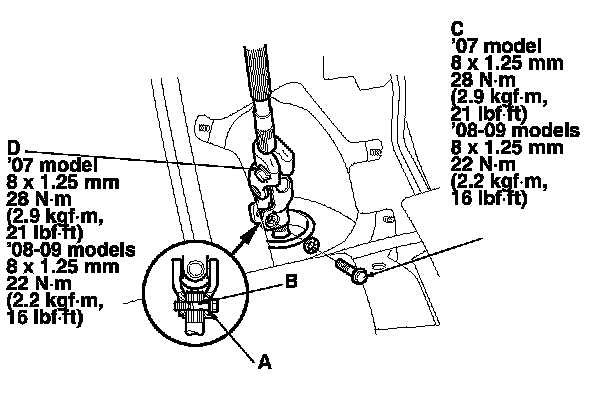
36. Insert the upper end of the steering joint onto the steering shaft (A) (line up the bolt hole (B) with the flat portion (C) on the shaft), and loosely install the upper joint bolt (D).
37. Slip the lower end of the steering joint onto the pinion shaft taking care to align the gap (E) within the angle.
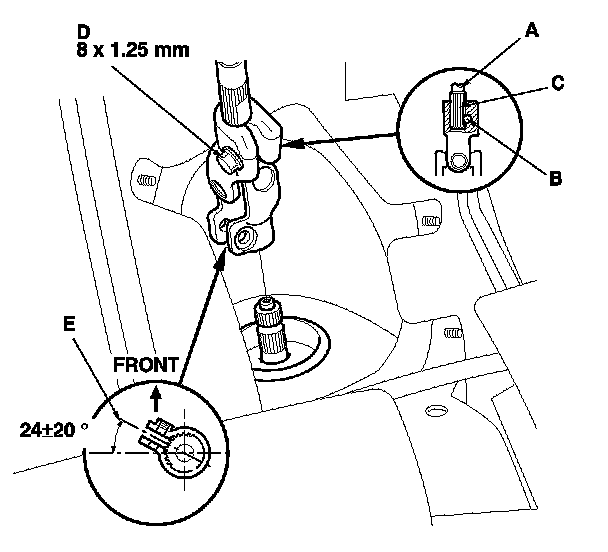
38. Align the bolt hole (A) on the steering joint with the groove (B) around the pinion shaft then loosely install the joint bolt (C).
39. Pull on the steering joint to make sure that the steering joint is fully seated, then tighten the lower joint bolt to the specified torque.
40. Tighten the upper joint bolt (D) to the specified torque.
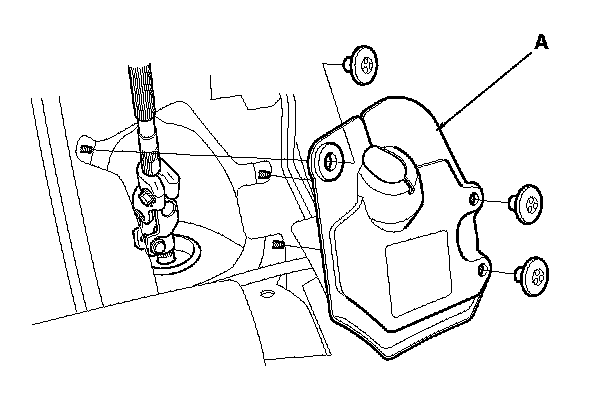
41. Install the steering joint cover (A).
42. Install the steering wheel. Steering Wheel Installation
43. Do the battery terminal reconnection procedure, Procedures and do these tasks:
- Turn the ignition switch to ON (II); the SRS indicator should come on for about 6 seconds and then go off.
- Make sure the horn and turn signal switches work properly.
- Make sure the steering wheel switches work properly.
44. Fill the system with power steering fluid, and bleed air from the system. Service and Repair
45. After installation, do these checks:
- Start the engine, allow it to idle, and turn the steering wheel from lock-to-lock several times to warm up the fluid. Check the gearbox for leaks. Power Steering Fluid Leakage Inspection
- Check the steering wheel spoke angle. If steering spoke angles to the right and left are not equal (steering wheel and rack are not centered), correct the engagement of the joint/pinion shaft serrations, then adjust the front toe by turning the tie-rod ends, if necessary.
- Set the steering column to the center tilt position, then do the front toe inspection. Service and Repair