Driver's Dashboard Lower Cover Removal/Installation
Driver's Dashboard Lower Cover Removal/Installation
Special Tools Required
- KTC trim tool set SOJATP2014*
*Available through the Acura Tool and Equipment Program.
NOTE:
- Take care not to scratch the dashboard and its related parts.
- Use the appropriate tool from the KTC trim tool set to avoid damage when removing components.
1. Adjust the steering column upward.
2. Remove these items:
- Driver's outer dashboard trim Driver's Outer Dashboard Trim Removal/Installation
- Driver's inner dashboard trim Driver's Inner Dashboard Trim Removal/Installation
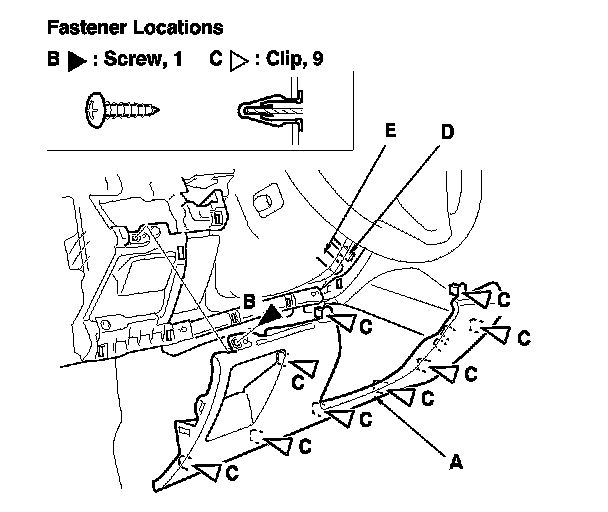
3. Remove the driver's dashboard lower cover (A).
-1 Remove the screw (B).
-2 Pull out the bottom of the driver's dashboard lower cover to release the clips (C).
-3 Disconnect the humidity/in-car temperature sensor connector (D) and the air hose (E).
4. Install the cover in the reverse order of removal, and note these items:
- Make sure the humidity/in-car temperature sensor connector is plugged in properly, and the air hose is connected properly.
- If the clips are damaged or stress-whitened, replace them with new ones.
- Push the clips into place securely.