Second Row Seat Disassembly/Reassembly - Left Second Row Seat
Second Row Seat Disassembly/Reassembly - Left Second Row Seat
Special Tools Required
- KTC trim tool set SOJATP2014*
*Available through the Acura Tool and Equipment Program.
Left Second Row Seat
NOTE:
- Put on gloves to protect your hands.
- Use the appropriate tool from the KTC trim tool set to avoid damage when removing components.
- Take care not to scratch the body or tear the seat covers.
1. Remove the second row seat. Second Row Seat Removal/Installation
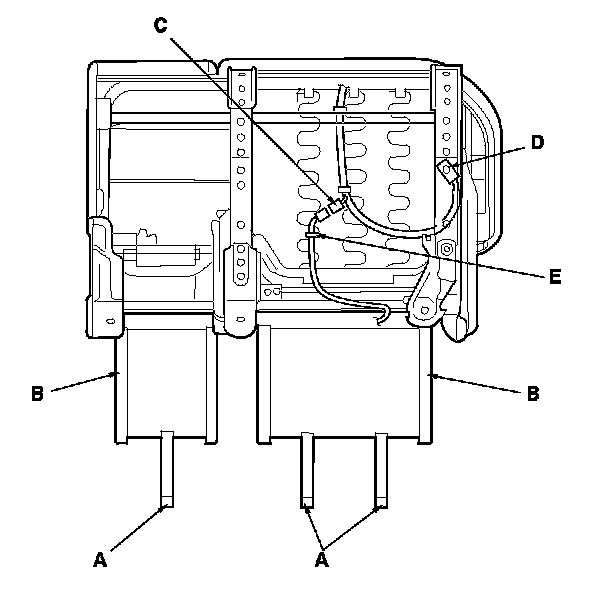
2. From under the seat cushion, release the hooks (A) of the back cover carpet (B) from the seat cushion frame, then pull the carpet back.
3. With seat heater: Disconnect the seat-back heater connector (C), detach the seat heater connector (D), and remove the wire tie (E).
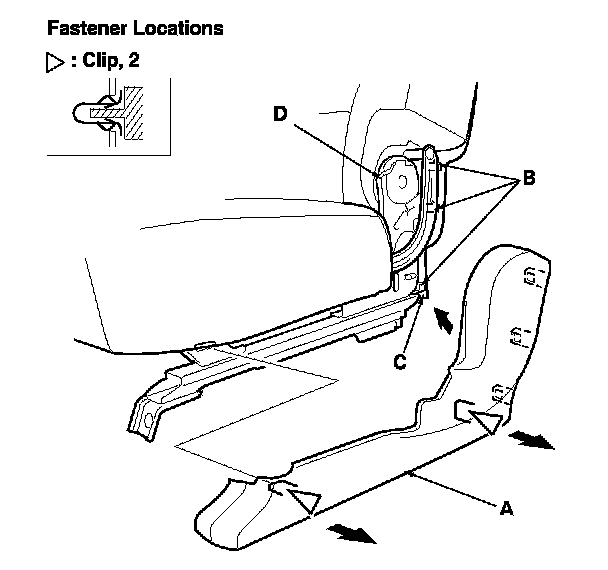
4. Gently pull out the recline outer cover (A) to detach the clips and to release the hooks (B) of the recline inner cover (C), then remove the cover while releasing the inside edge of the cover from the recline adjuster (D).
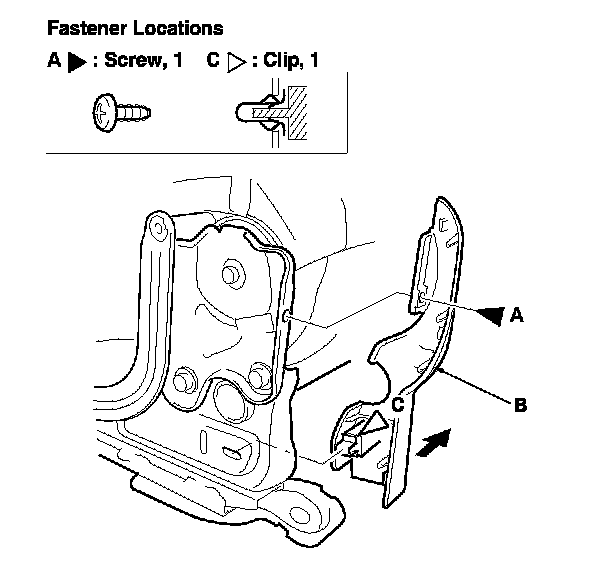
5. Remove the screw (A), gently pull out the recline inner cover (B) to detach the clip (C), then remove it.
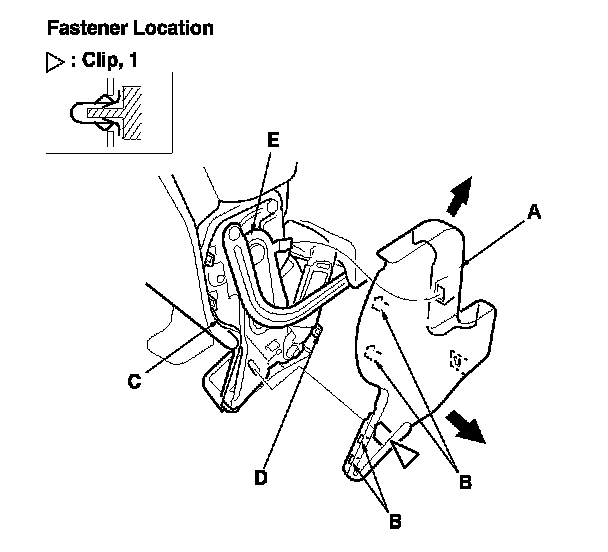
6. Gently pull out the ISO-FIX bracket outer cover (A) to detach the clip. Release the hooks (B) from the ISO-FIX bracket inner cover (C), and release the hook (D) of the inner cover from the outer cover, then remove the cover while releasing the inside edge of it from the ISO-FIX bracket (E).
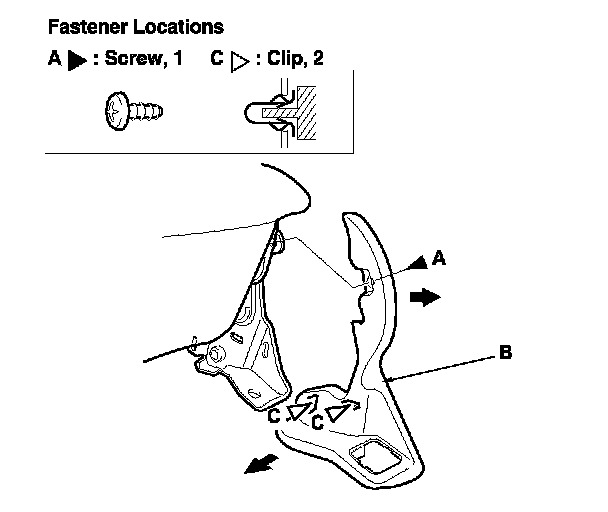
7. Remove the screw (A) gently pull out the ISO-FIX bracket inner cover (B) to detach the clips (C), then remove it.
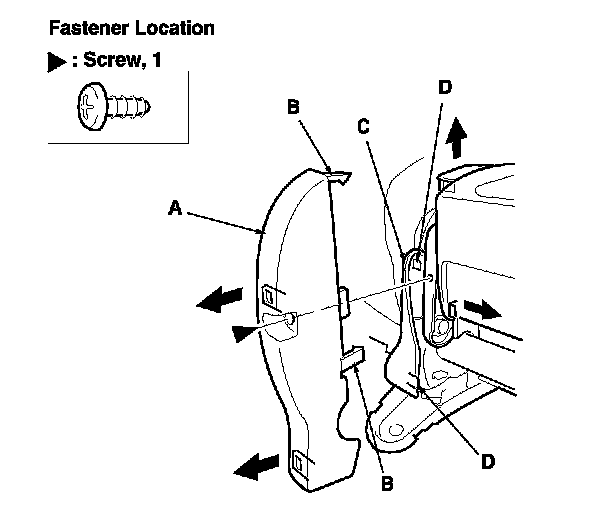
8. Remove the screw, gently pull out the rear center outer cover (A) to release the hooks (B) from the center inner cover (C), and to release the hooks (D) of the inner cover from the outer cover, then remove it.
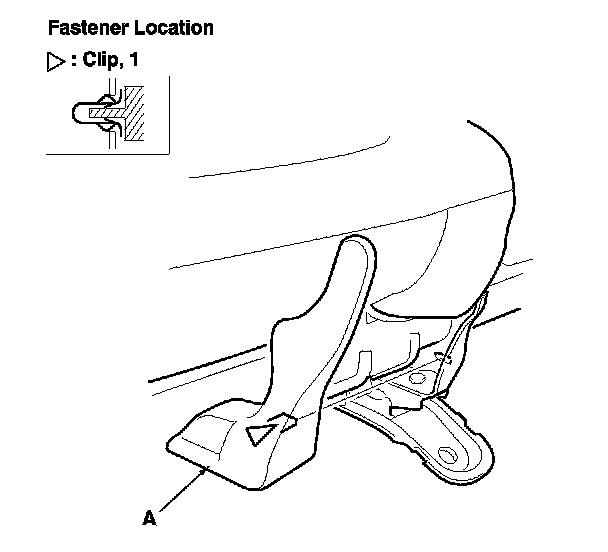
9. Gently pull out the center inner cover (A) to detach the clip, then remove it.
10. Remove the seat cushion (A).
-1 Remove the seat belt buckles (B) and seat belt detachable anchor (C) from the elastic straps (D).
-2 Remove the nuts (E). Using a TORX T30 bit, remove the bolts (F).
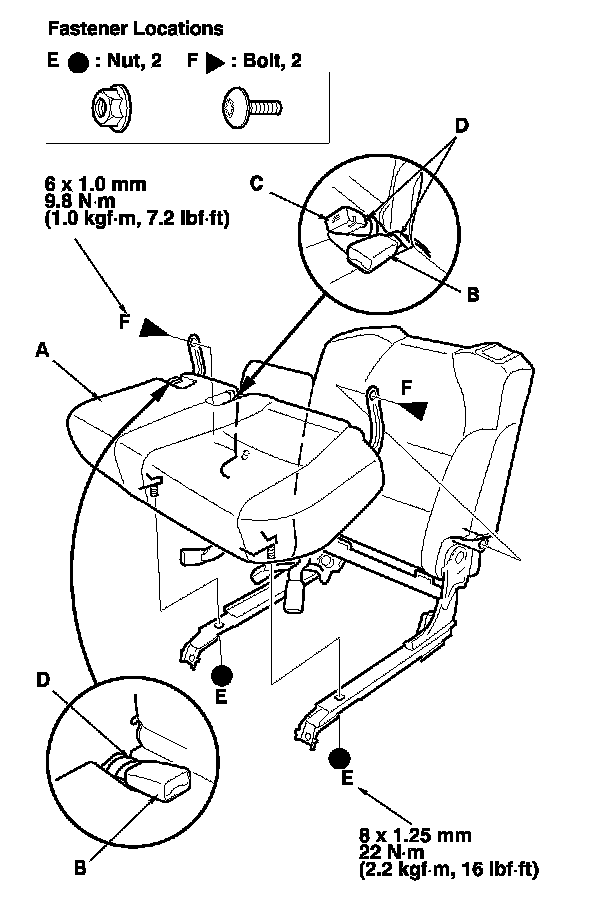
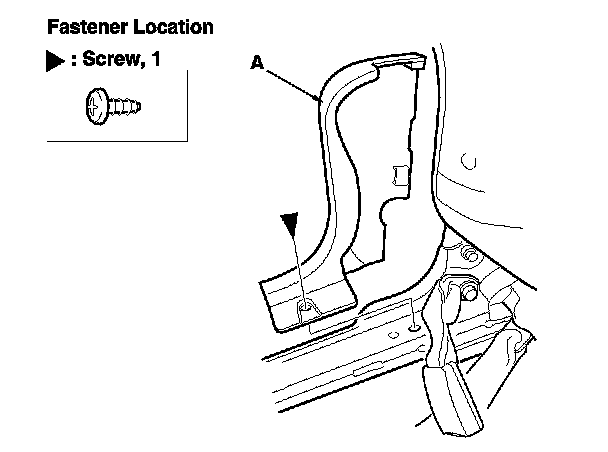
11. Remove the screw, then remove the front center outer cover (A).
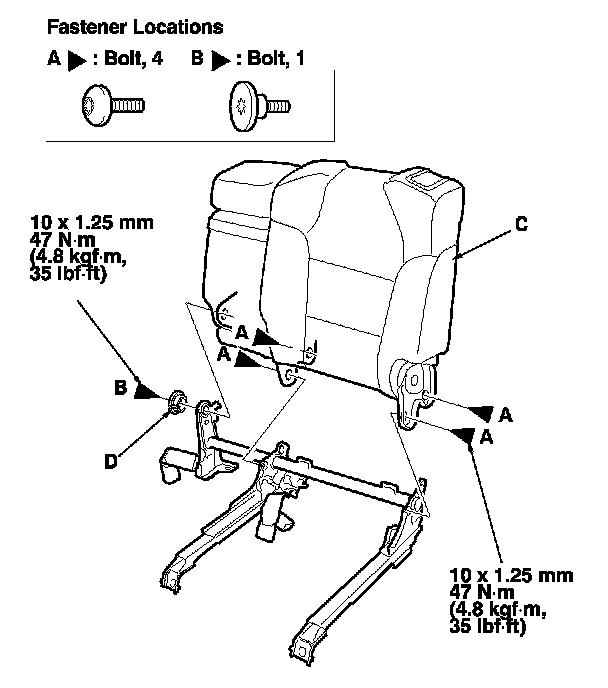
12. Using a TORX T40 bit, remove the bolts (A, B), then remove the seat-back (C) and bushing (D).
13. Assemble the seat-back and seat cushion in the reverse order of disassembly, and note these items:
- If the bushing is damaged or stress-whitened, replace it with a new one.
- Replace any damaged clips with new ones.
- Push the clips and hooks into place securely.
- With seat heater: Replace the wire tie you removed with a new one.
- With seat heater: Make sure the seat-back heater connector is plugged in properly.