No Sound Is Heard From the Speaker(s) (Display Is Normal) (Without Navigation)
No sound is heard from speaker(s) (display is normal) (without navigation)NOTE:
- Set the fader and balance positions to the center.
- Before doing troubleshooting, do the power switch will not turn ON troubleshooting.
- Always check the connectors for poor connections or loose terminals.
1. Check that the volume button is not set to the min level.
Is it at the MIN level?
YES - Raise the volume level, and recheck the function.
NO - Go to step 2.
2. Do the speaker check mode with the self-diagnostic function.
Did all speakers produce a tone?
YES - Go to step 8.
NO - Go to step 3.
3. Turn the ignition switch OFF.
4. Check the faulty speaker(s) for damage.
Is there any damage?
YES - Replace the speaker and recheck.
NO - Go to step 5.
5. Remove the speaker(s) that has no sound, and disconnect its connector.
6. Check the speaker connector for a loose or poor connection.
Reconnect the speaker connector, and recheck the symptom; is the condition still present?
YES - Go to step 7.
NO - Intermittent failure. Operation is normal.
7. Test the speaker(s).
Is the speaker OK?
YES - Go to step 8.
NO - Replace the speaker(s).
8. Do the audio unit self-diagnostic function DSP unit communication check.
Is the DSP communication OK?
YES - Go to step 9.
NO - Audio unit is faulty, replace the audio unit.
9. Disconnect stereo amplifier connector B (18P).
10. Turn the ignition switch ON (II).
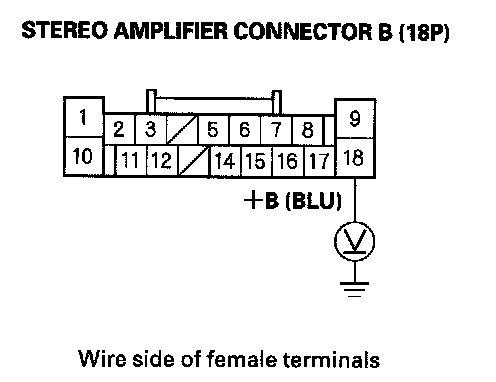
11. Measure the voltage between stereo amplifier connector B (18P) No. 18 terminal and body ground.
Is there battery voltage?
YES - Go to step 12.
NO - Repair open in the between No. 8 (30 A) fuse in the under-dash fuse/relay box and stereo amplifier connector B (18P) No. 18 terminal.
12. Disconnect stereo amplifier connector A (20P).
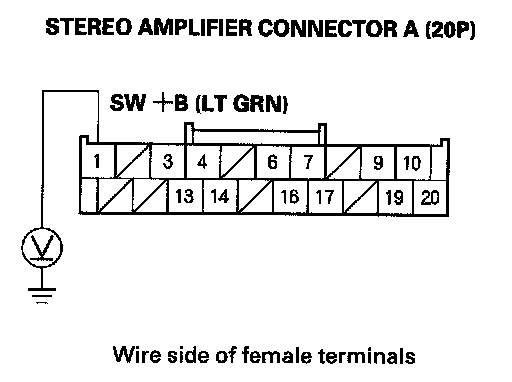
13. Measure the voltage between stereo amplifier connector A (20P) No. 1 terminal and body ground.
Is there battery voltage?
YES - Go to step 14.
NO - Repair open in the between the stereo amplifier connector A (20P) No. 1 terminal and audio unit connector B (32P) No. 23 terminal.
14. Reconnect the stereo amplifier connector B (18P).
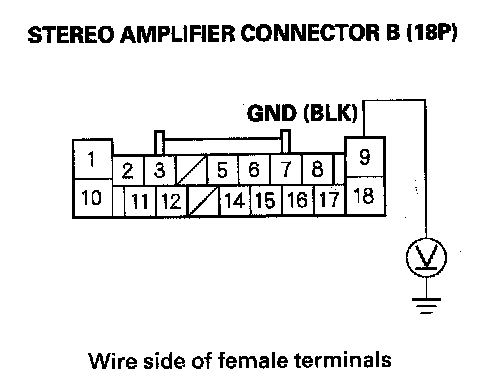
15. Measure the voltage between stereo amplifier connector B (18P) No. 9 terminal and body ground.
Is there less than 0.1 V?
YES - Go to step 16.
NO - Repair open to the body ground in the wire between the stereo amplifier connector B (18P) No. 9 terminal and body ground (G504).
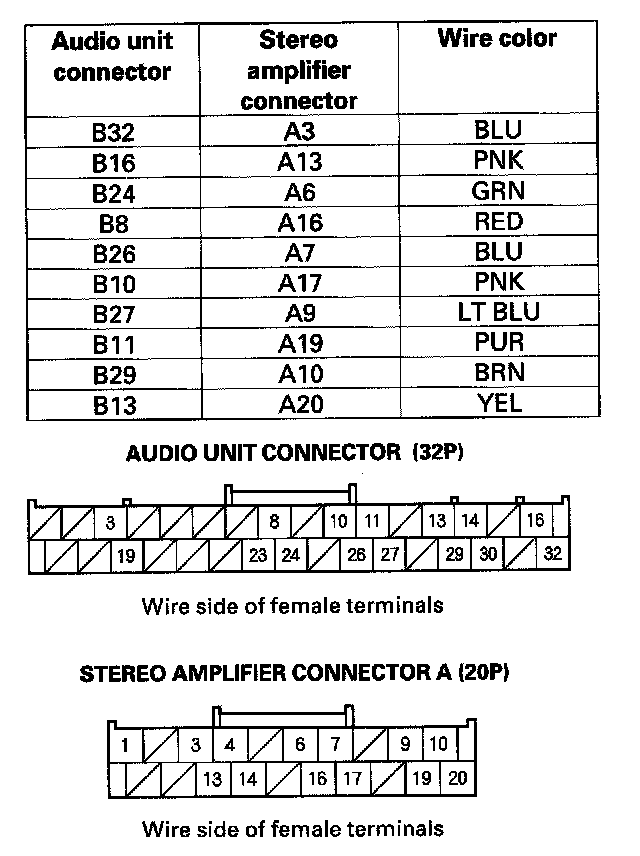
16. Check for continuity between audio unit connector B (32P) and stereo amplifier connector A (20P) according to the table.
Is there continuity?
YES - Go to step 17.
NO - Repair open in the appropriate wire(s) between the audio unit and stereo amplifier.
17. Disconnect stereo amplifier connector B (18P) and speaker connector.
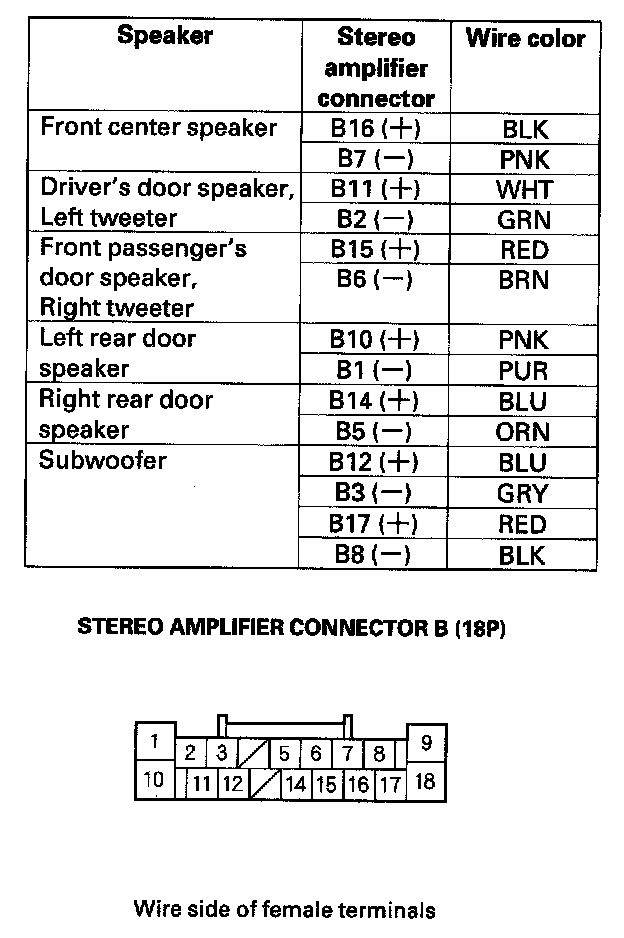
18. Check for continuity between body ground and stereo amplifier connector B (18P) according to the table.
Is there continuity?
YES - Repair short in the wire(s) between the stereo amplifier and the speaker(s).
NO - Go to step 19.
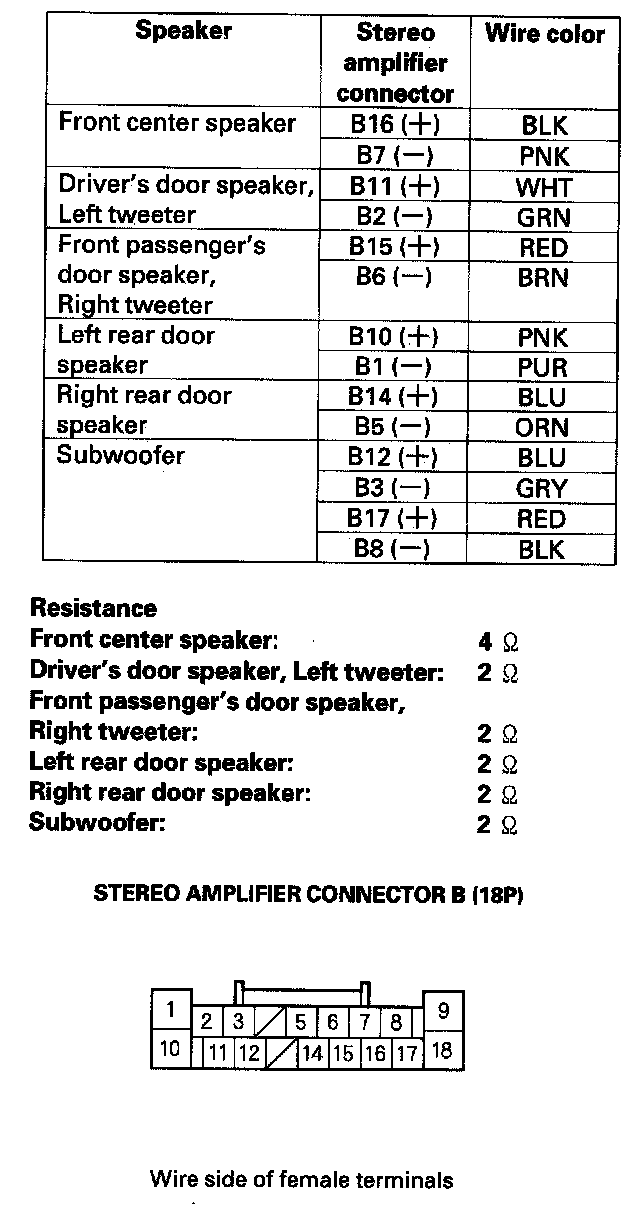
19. Measure the resistance between stereo amplifier connector B (18P) according to the table.
Is the resistance the same as indicated?
YES - Go to step 20.
NO - Repair open in the wire between the stereo amplifier and the speaker(s).
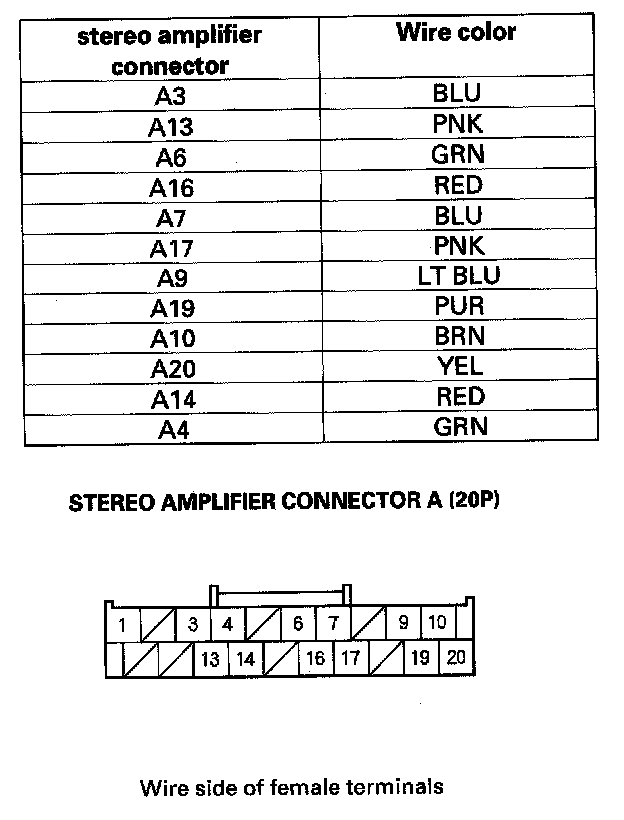
20. Check for continuity between stereo amplifier connector A (20P) and body ground according to the table.
Is there continuity?
YES - Repair short to body ground in the wire(s) between the audio unit and stereo amplifier.
NO - Go to step 21.
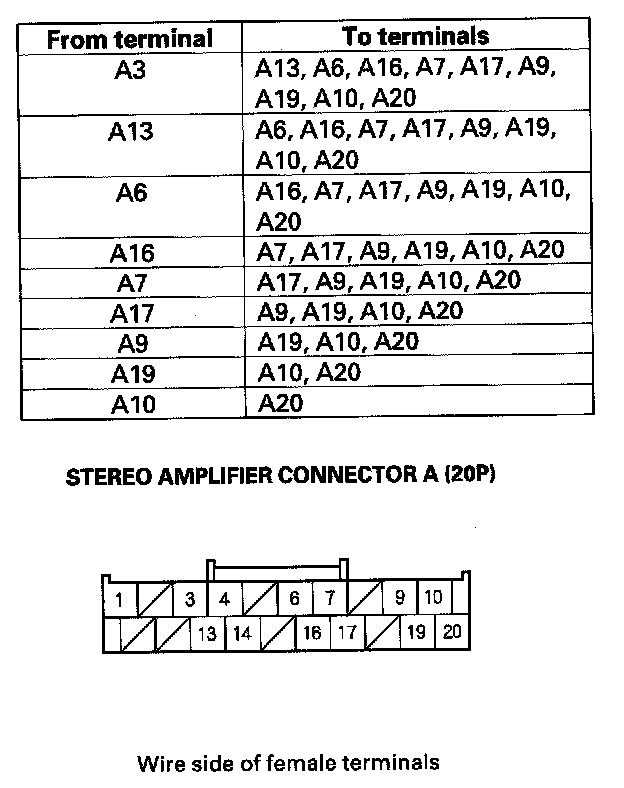
21. Check for continuity between the terminals of stereo amplifier connector A (20P) according to the table.
Is there continuity between any of the terminals?
YES - Repair short in the wire(s) between audio unit and stereo amplifier (replace appropriate shield harness).
NO - Substitute a known-good audio unit and recheck. If the symptom/indicated goes away, replace the original audio unit. If the symptom is still present, substitute a known-good stereo amplifier and recheck. If the symptom indicated goes away, replace the original stereo amplifier.